
Overview
August 2023
In this tutorial, I will take you on a whirlwind tour of what you can accomplish in VisionOS. I will assume you have very little Swift or iOS development experience and will emphasize the aspects that are specific to Vision Pro development.
We will cover the following topics:
- How to setup your environment?
- How to create a new VisionOS project?
- How to use SwiftUI, Immersive Space and import models?
- How to play with Reality Composer Pro?
- What to do next?
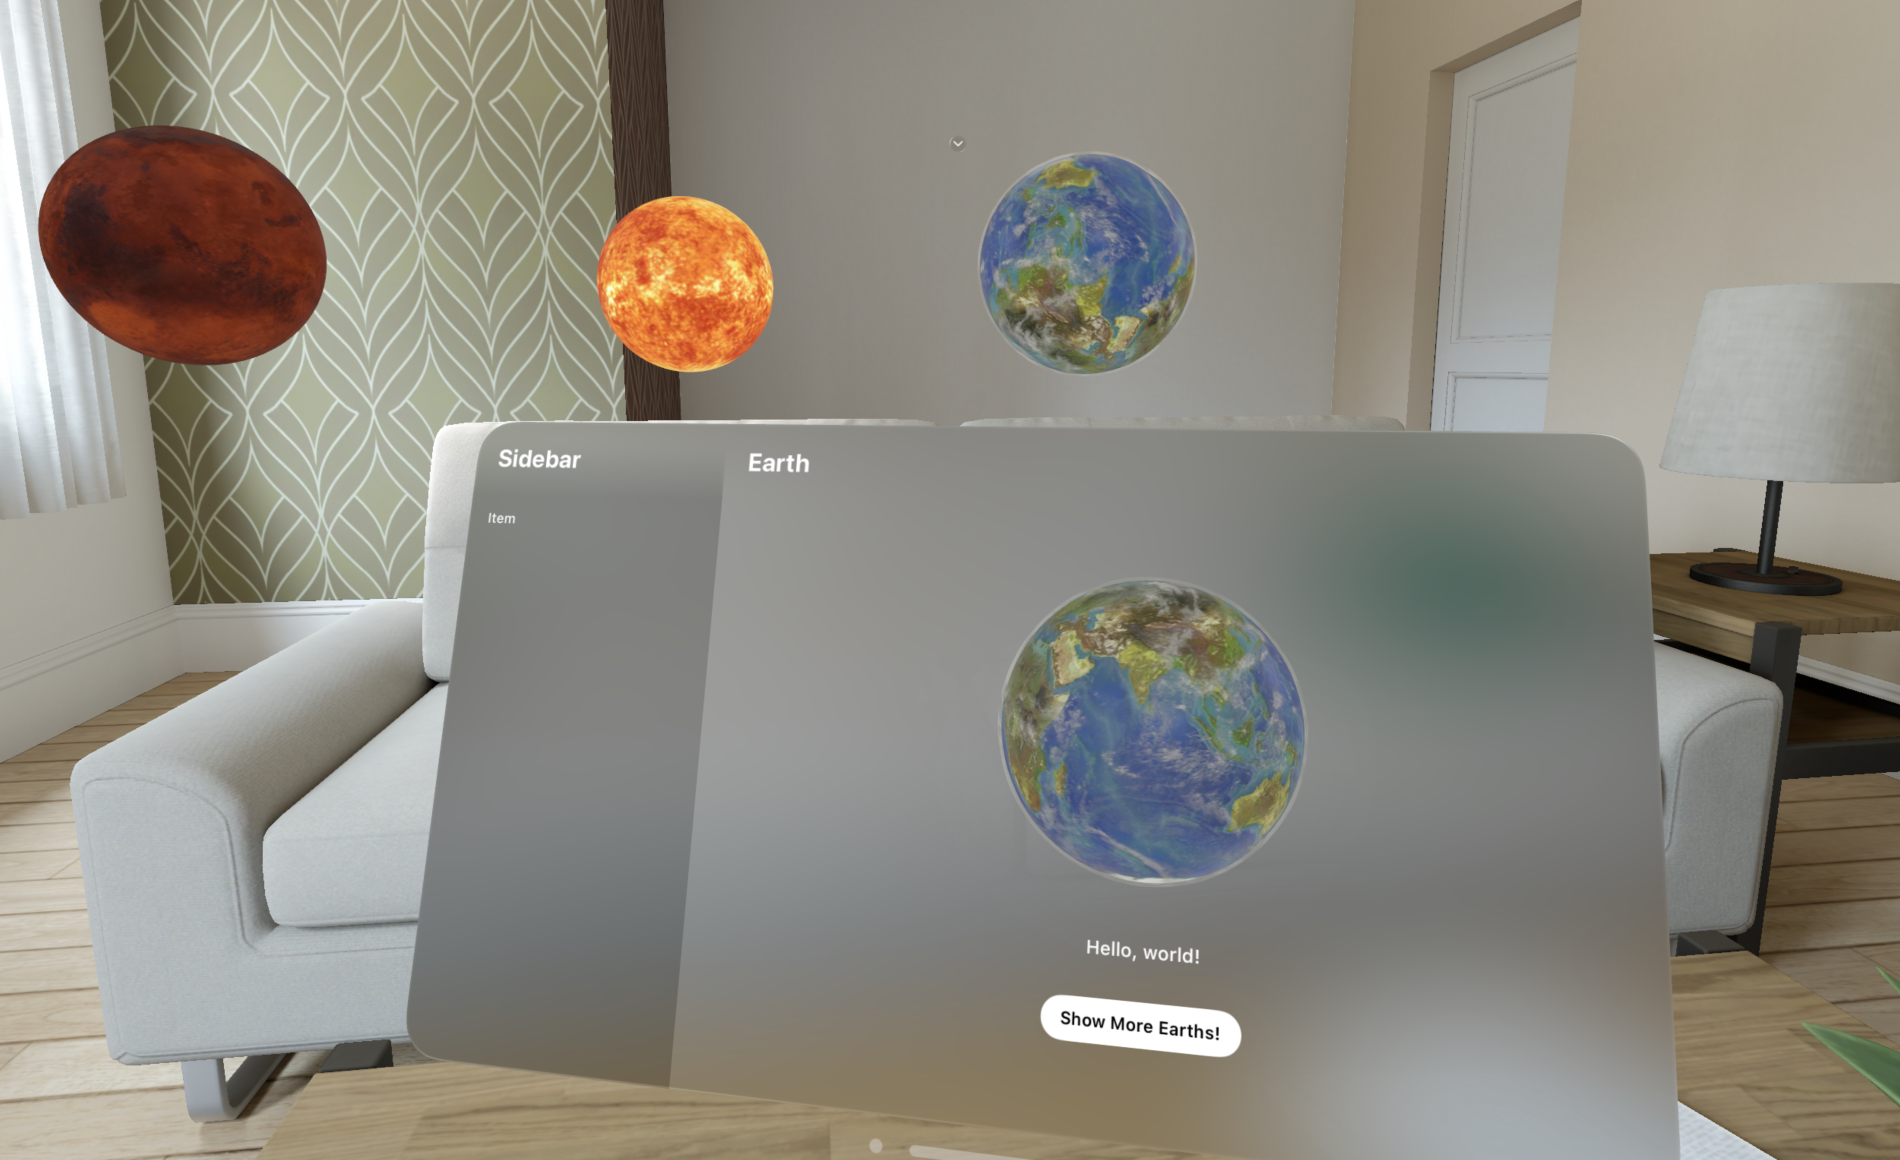
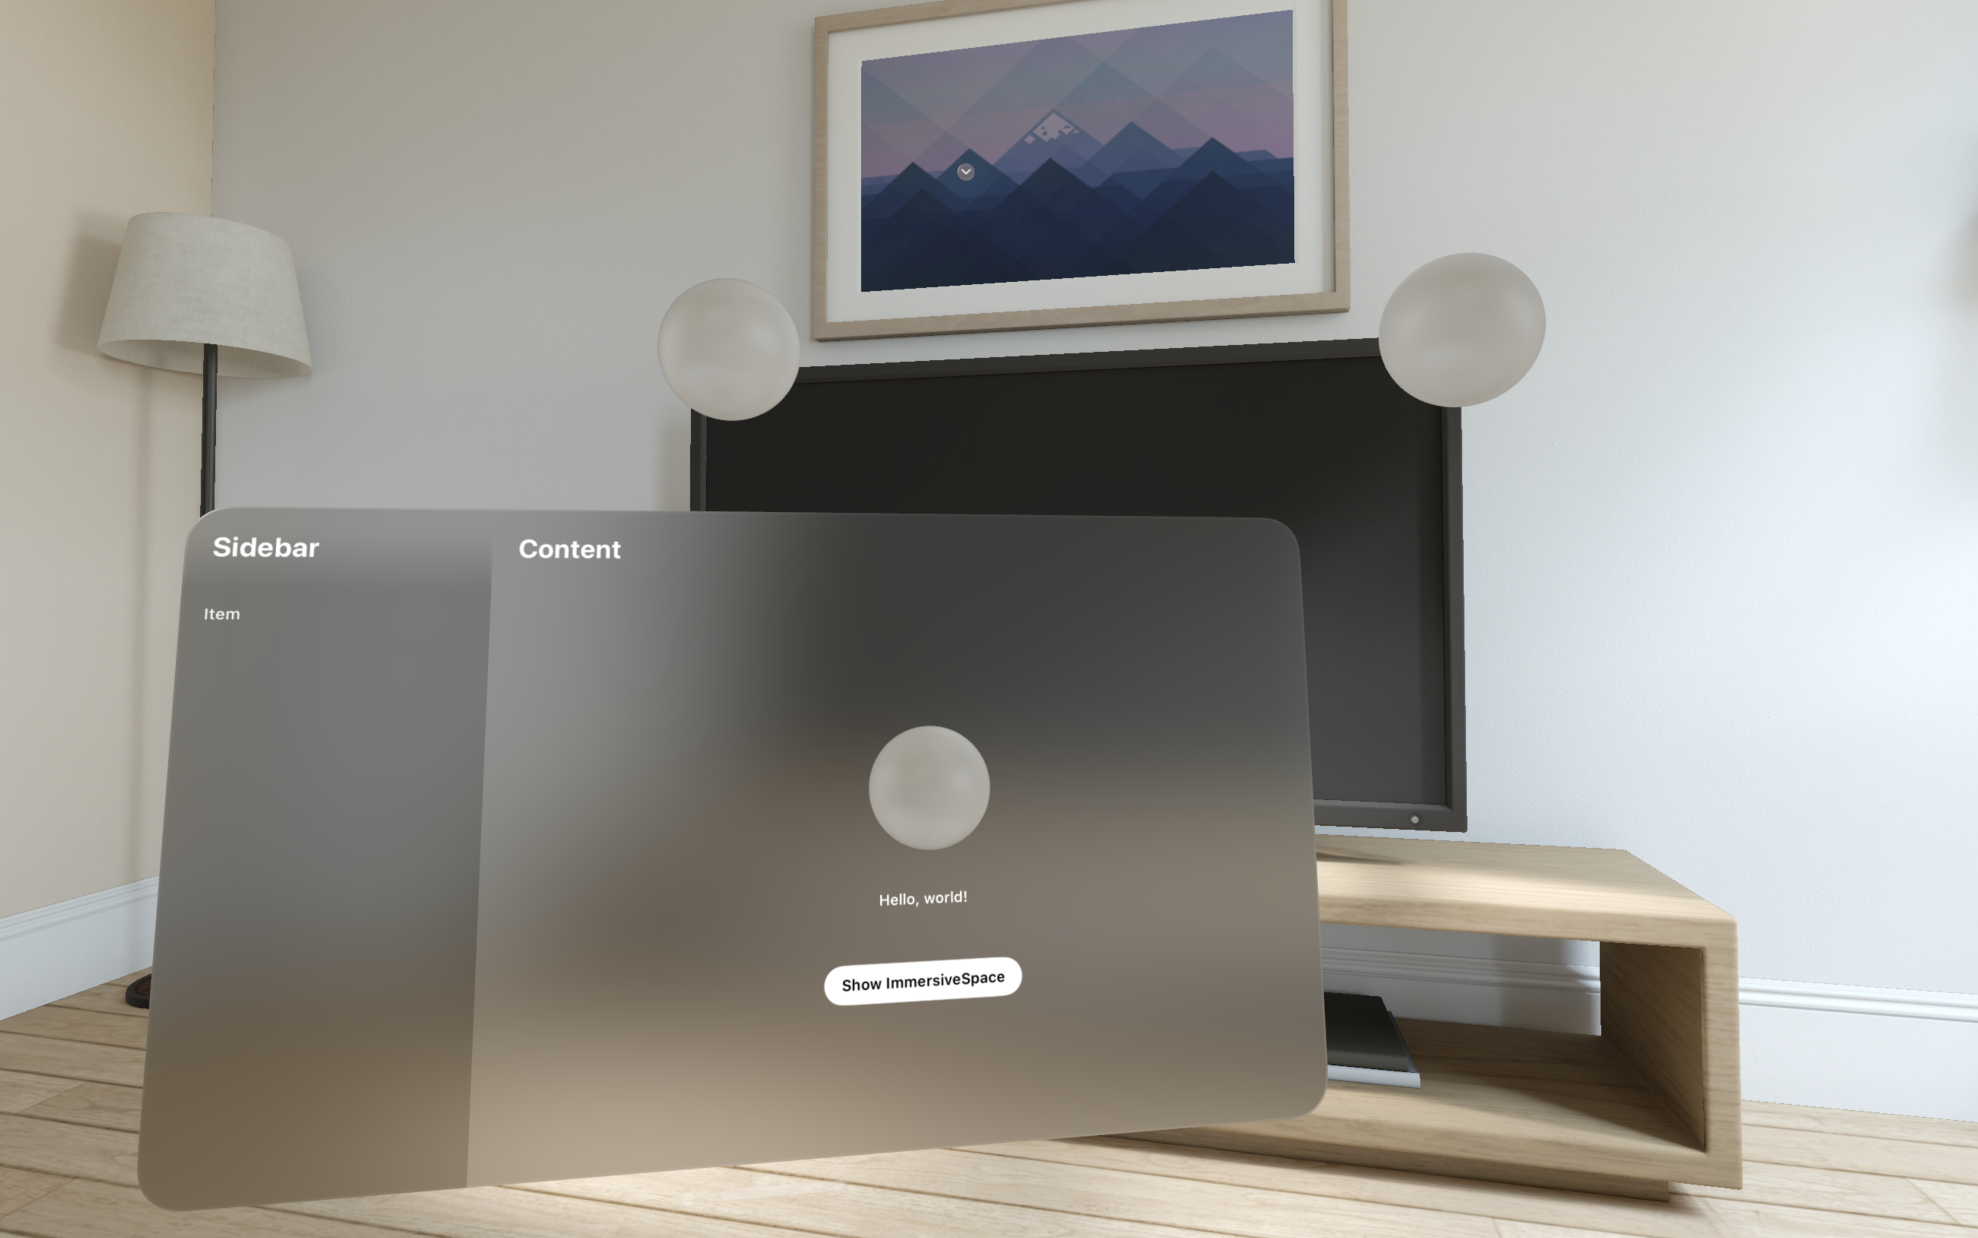
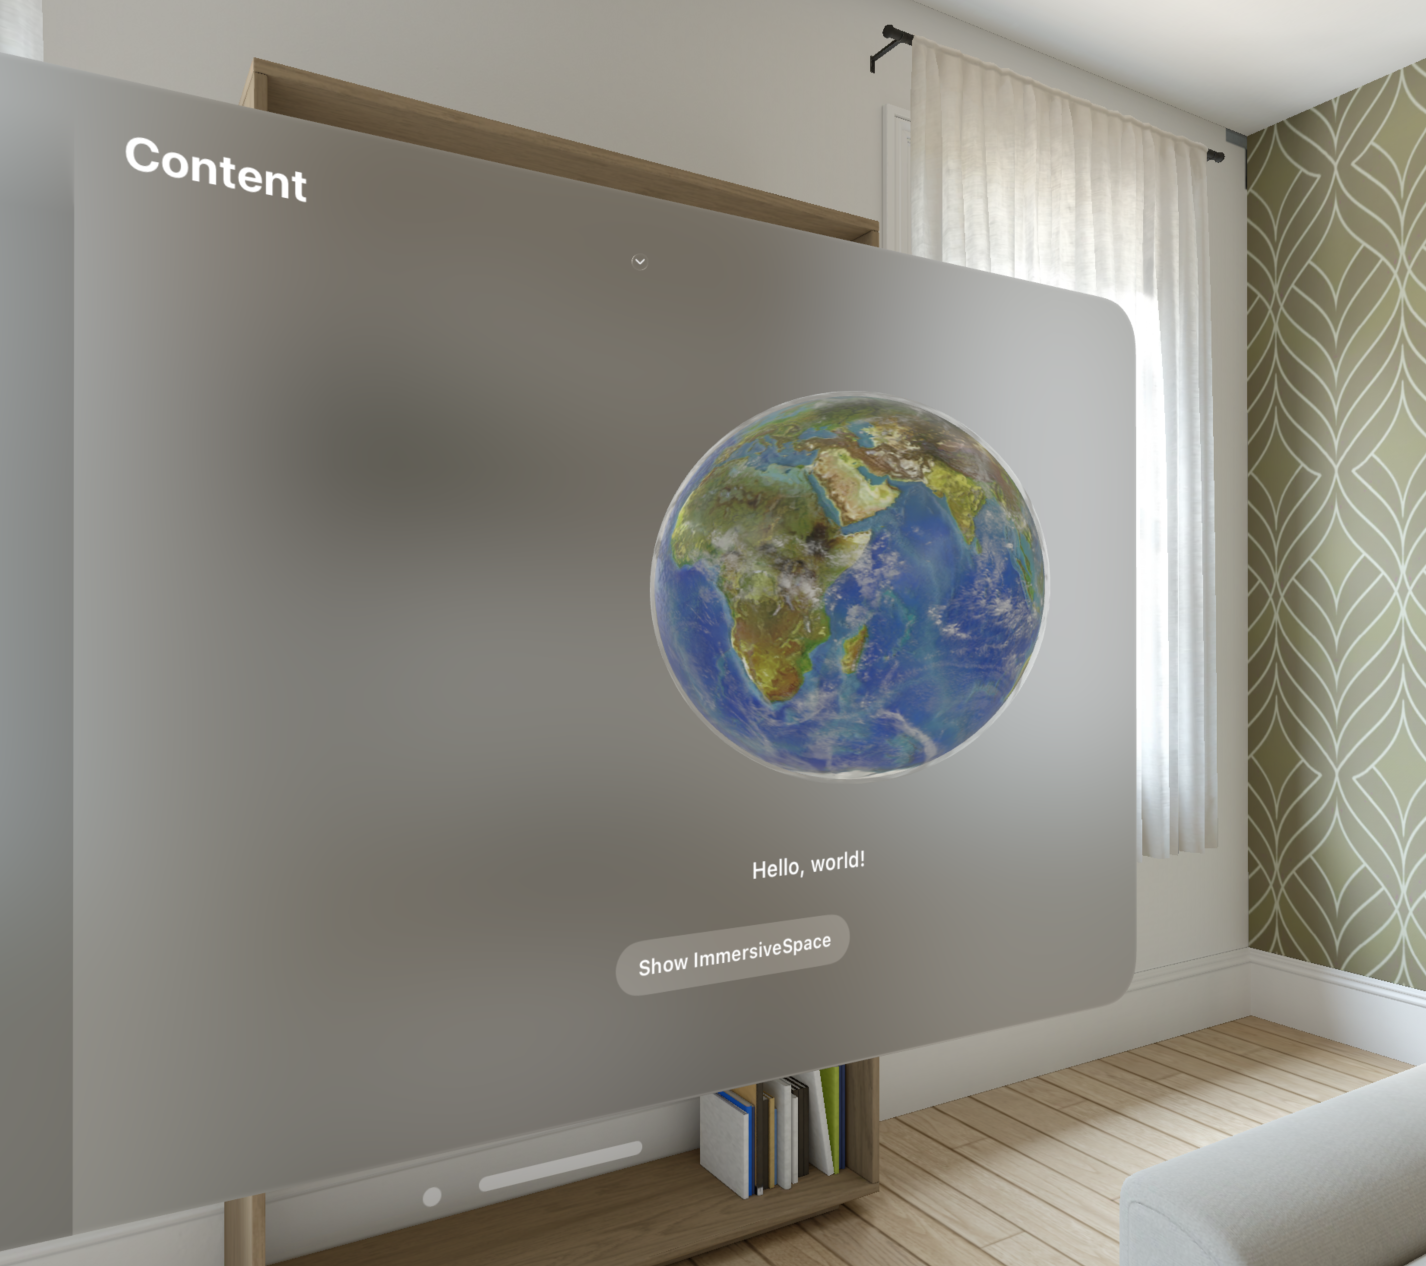
By the end of this tutorial, you will also create this small app:
Let’s goooooooooooooooooooooooooo!
Setup
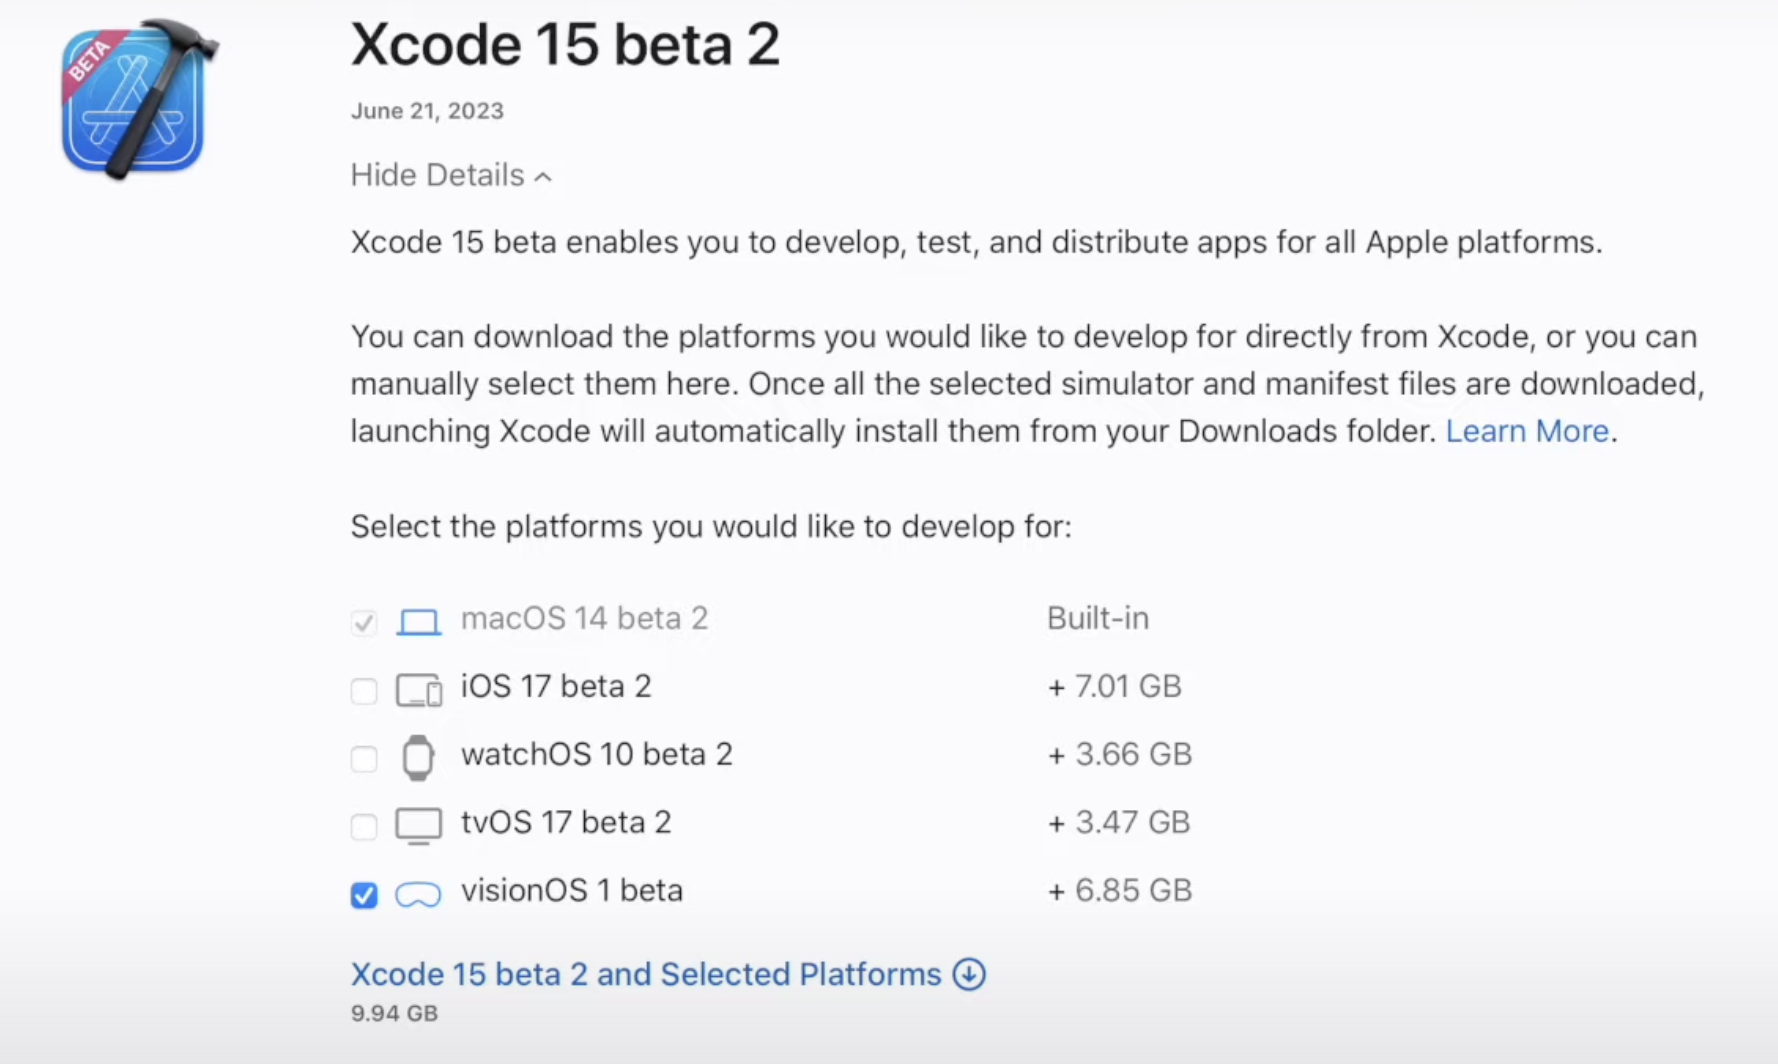
As of August 2023, you’ll need to download the beta version of Xcode from here. You’ll need a developer account, but it’s free – you only need to pay once you decided to publish your app. It may be annoying to register, but hey, that’s the price you have to pay to be on the bleeding edge!
If you are reading this after 2023, you can just search Xcode in App Store and download it directly.
No matter how you get it, be sure to select VisionOS platform when downloading it. This is a VisionOS tutorial after all.
Create New Project
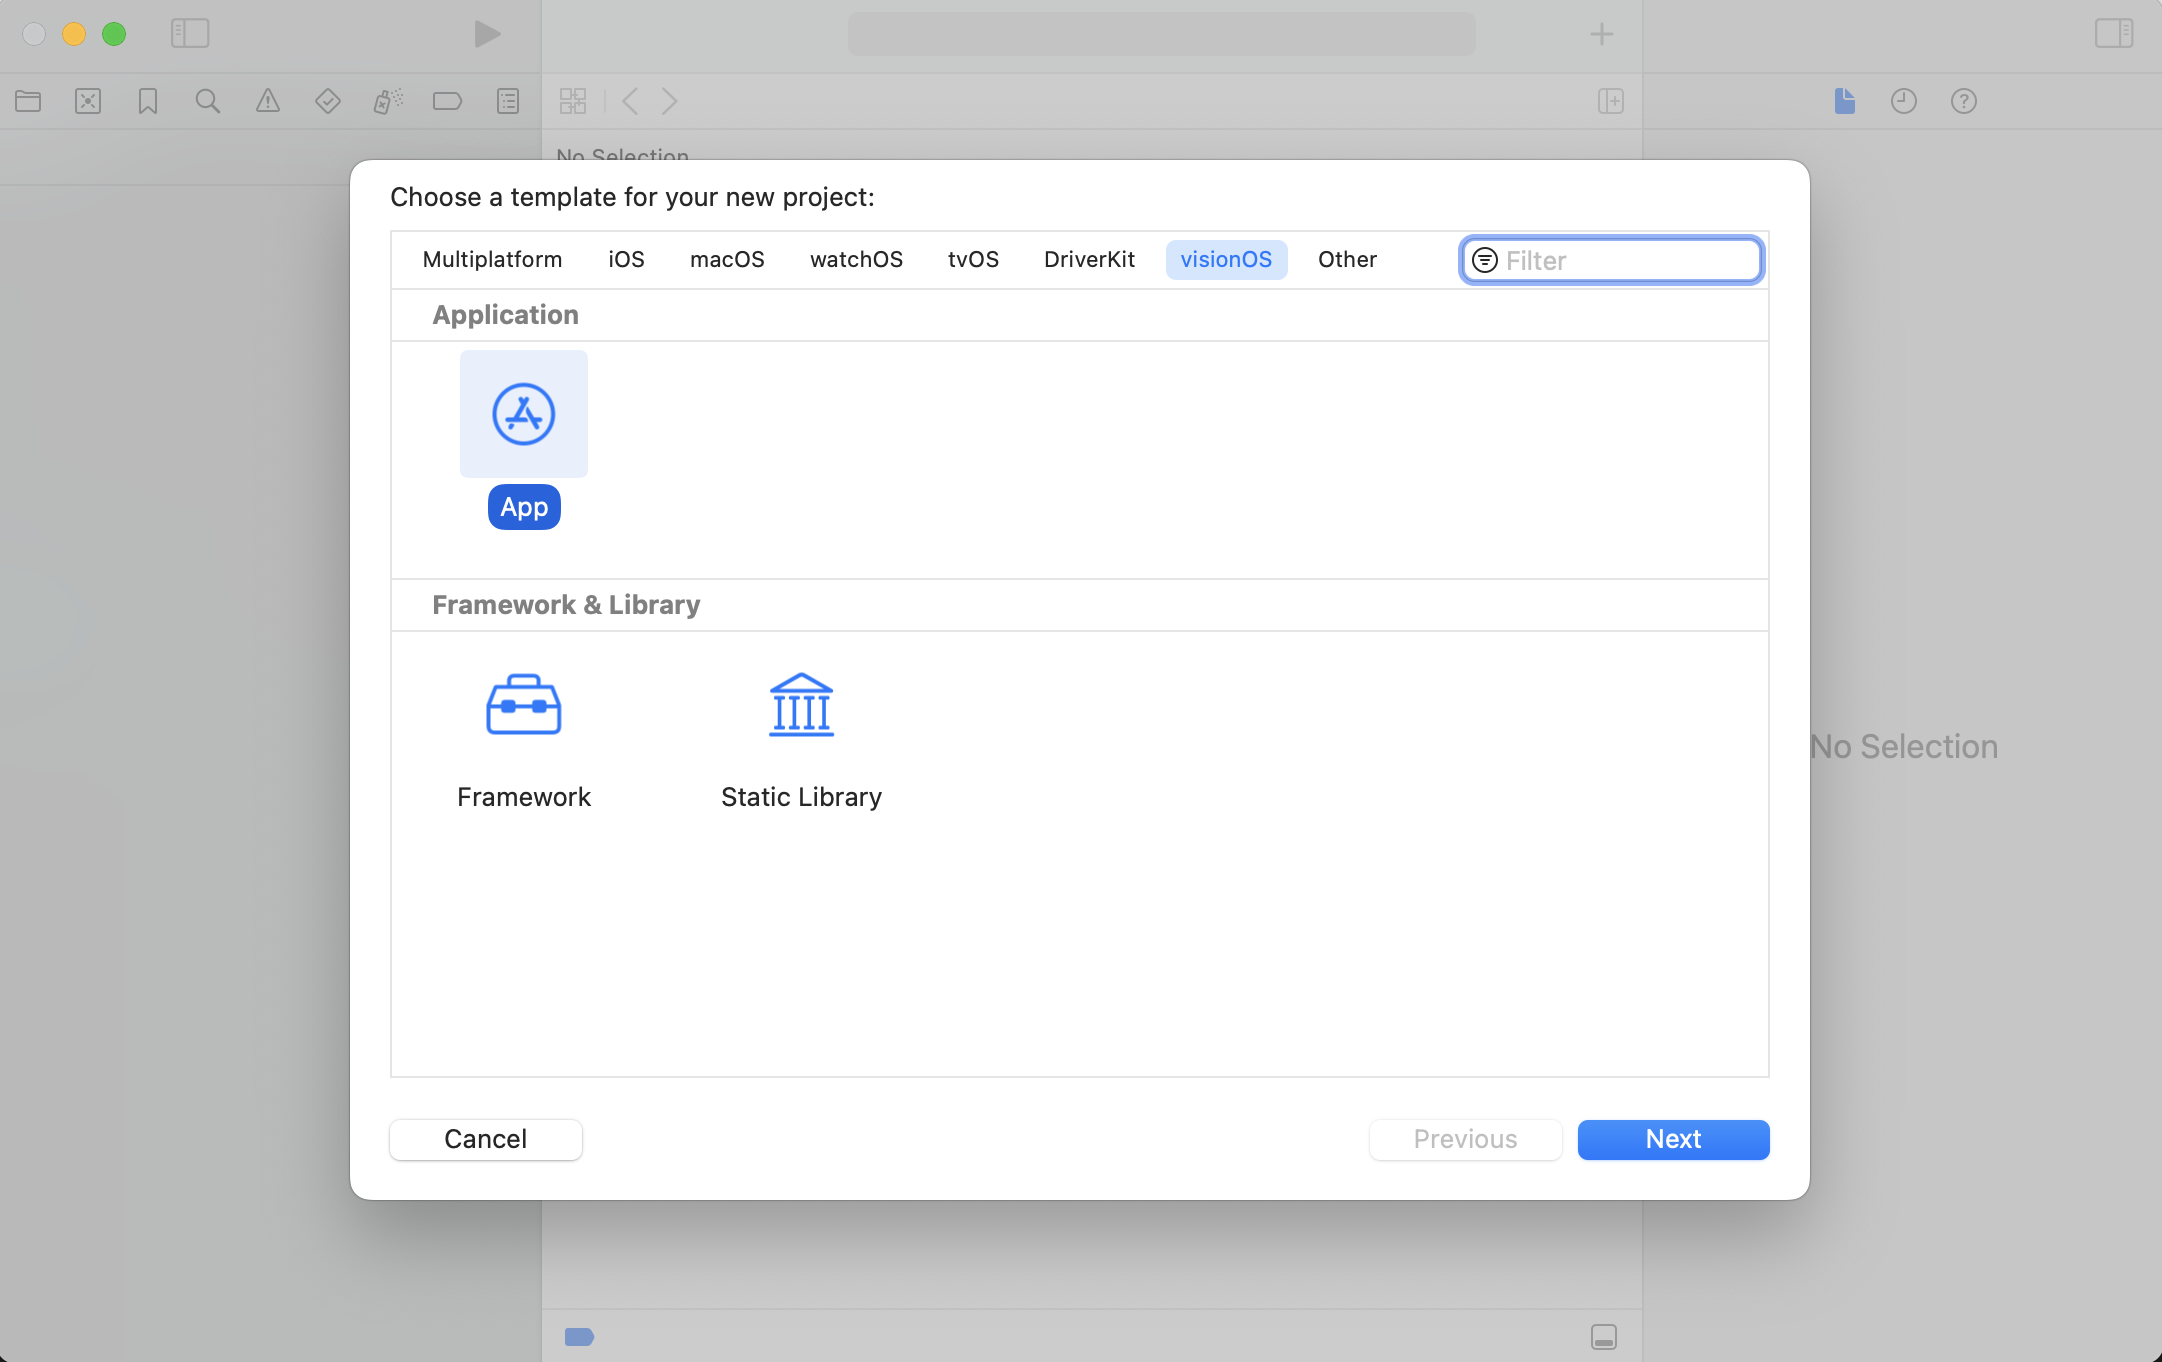
Once you launched Xcode, you can select Create New Project.... Then in the template, select VisionOS->App
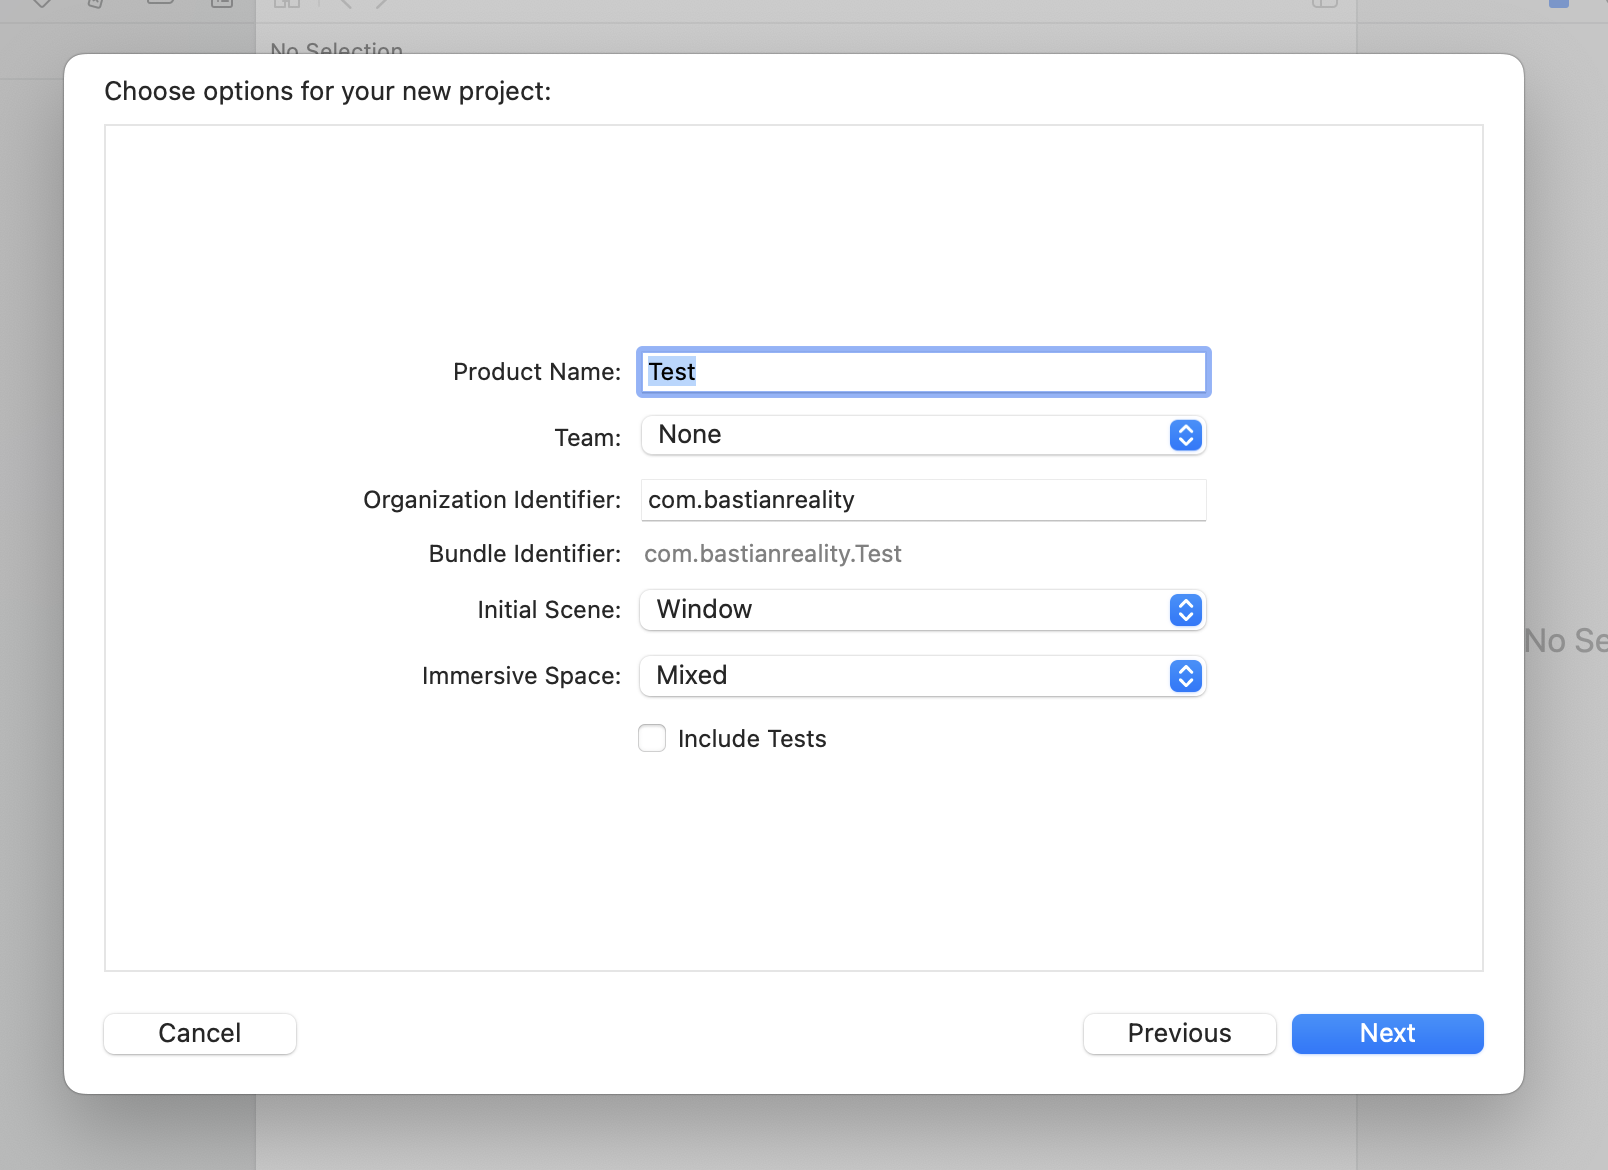
You will see this page next, you can name the project whatever you want. I’m calling mine WindowMixed. For this tutorial, we will select Window as the Initial Scene , and Mixed as the Immersive Space. We will cover what they mean in just a sec.
Let’s Understand the Code!
With your project created, you should see something like this:
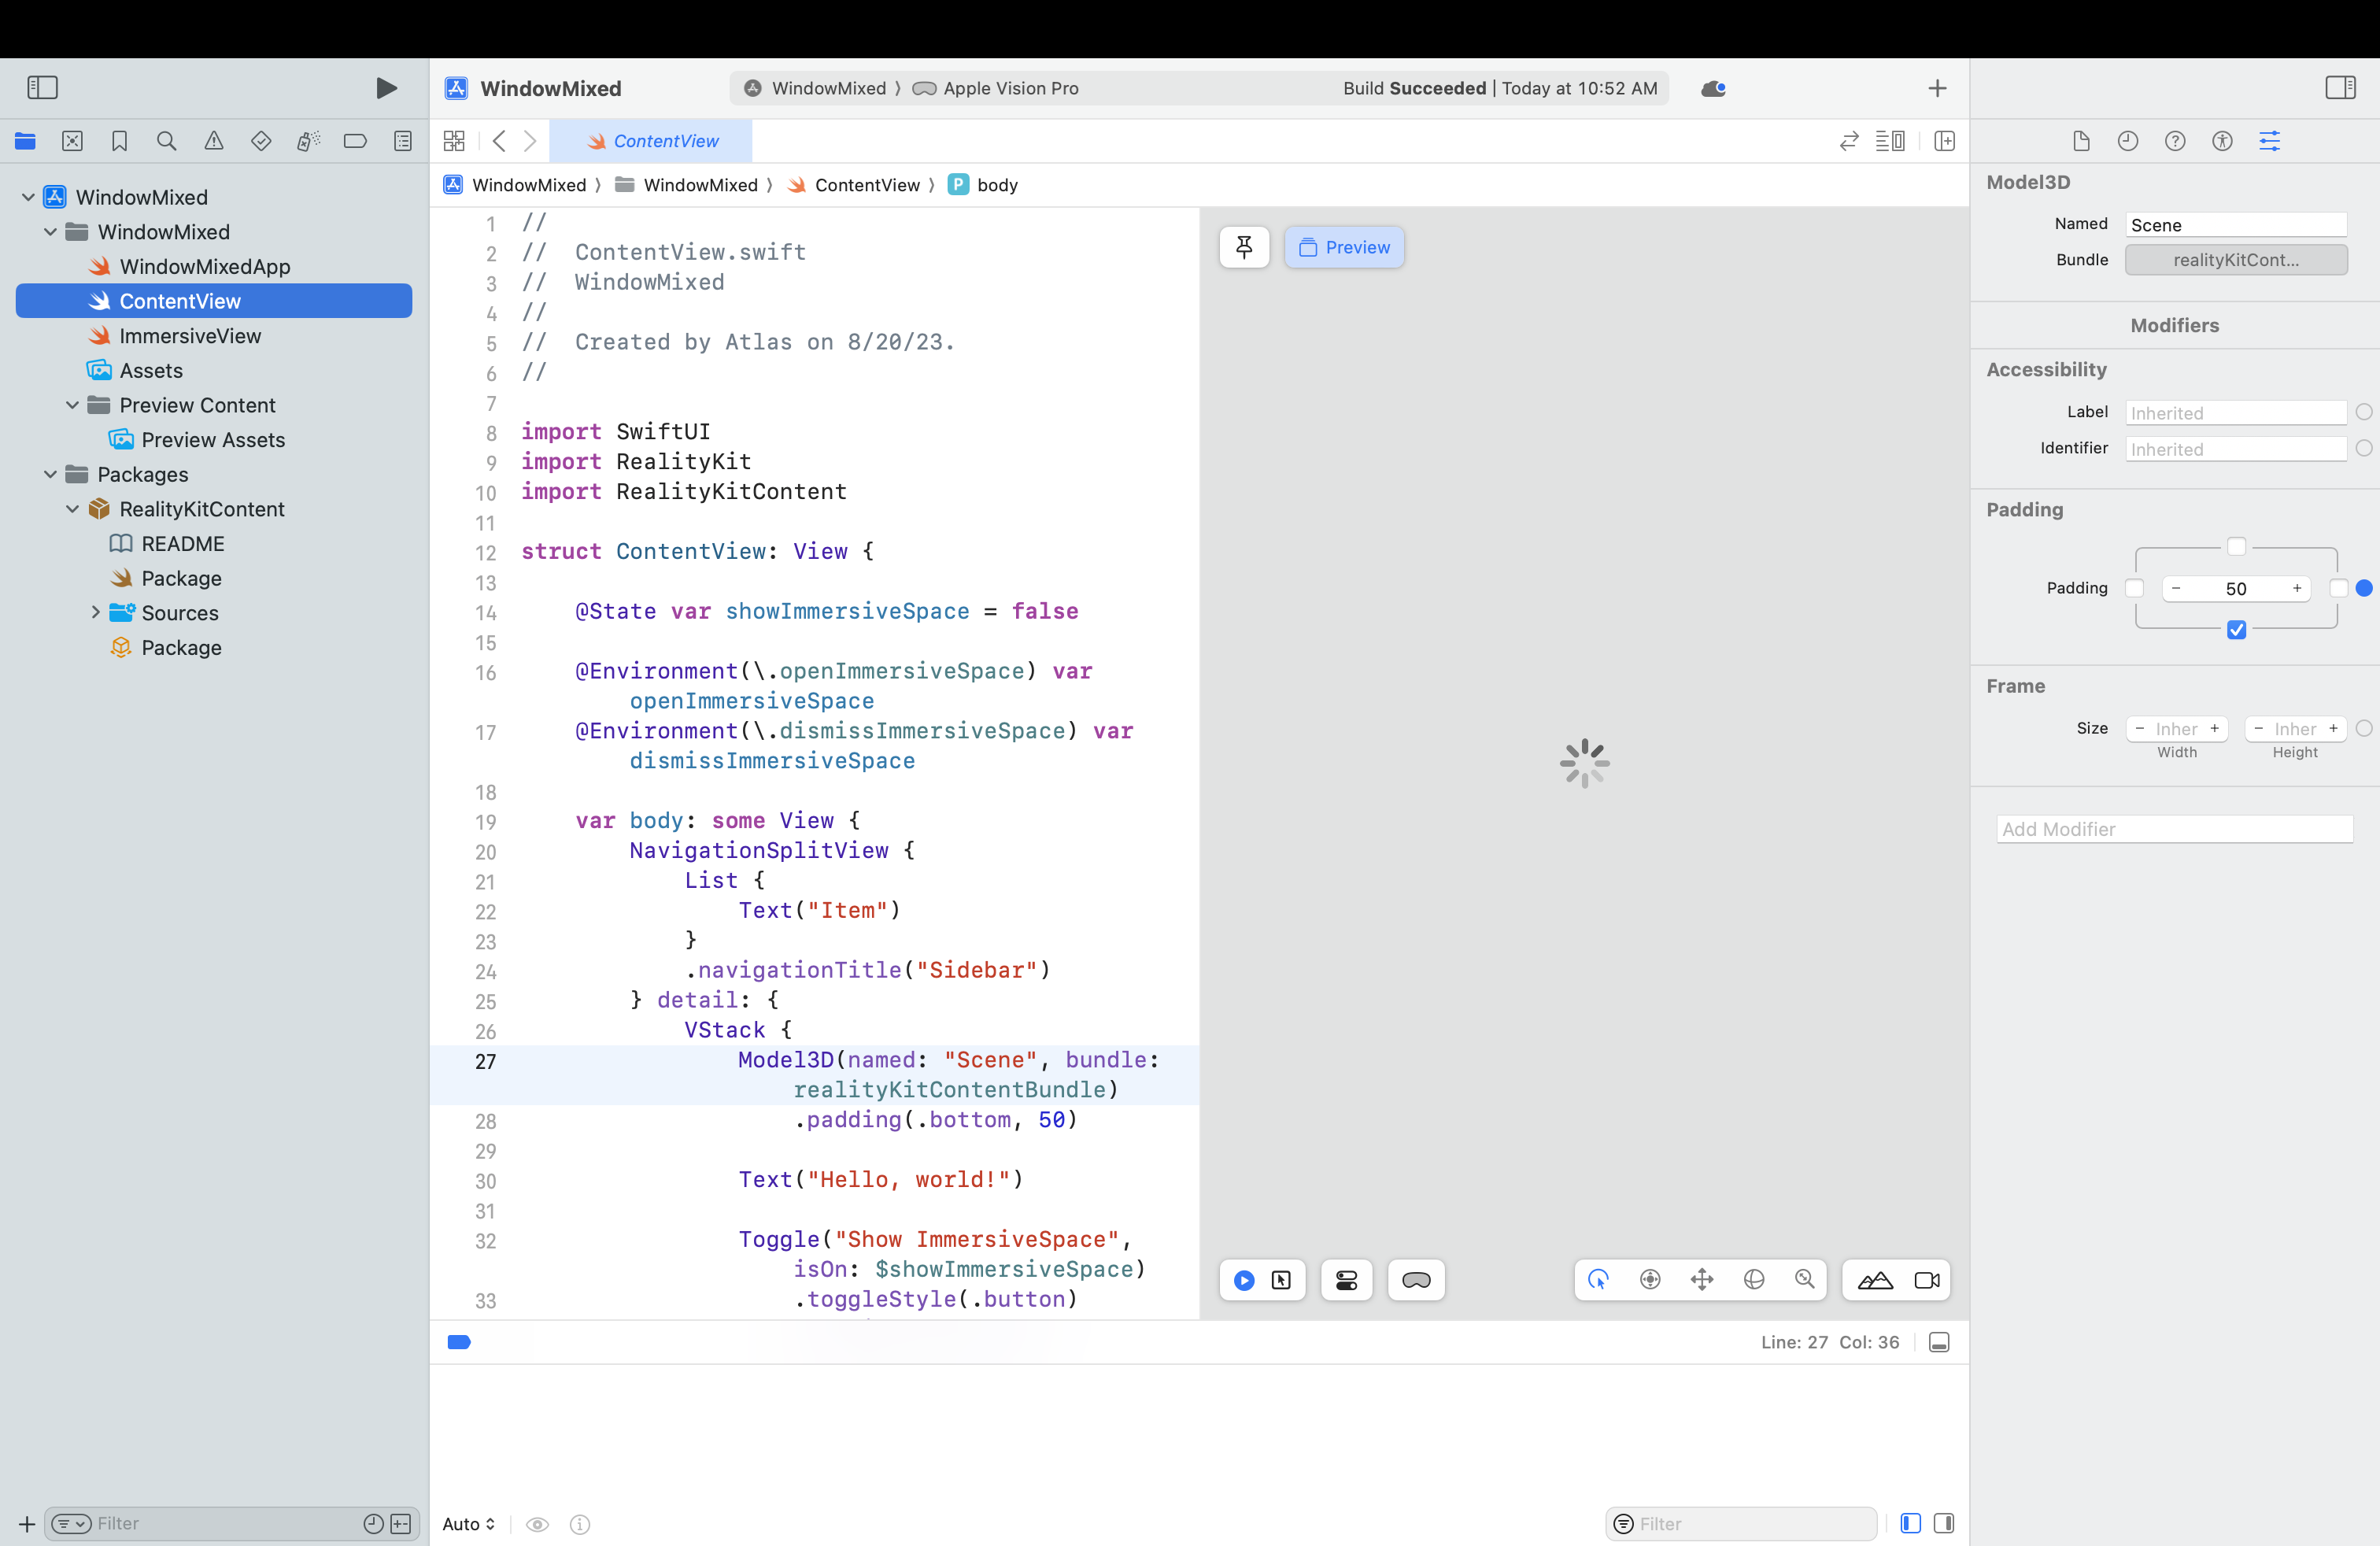
Wow, that’s a lot of code and files. No worries, we will take a look at what each file do, and play around with them. It is actually surprisingly easy to understand.
In fact, there are only 4 files we need to pay attention to:
The three main code files.
WindowMixedApp.swiftorYourProjectNameApp.swiftContentView.swiftImmersiveView.swiftNote: I’ve copied following code to this post as well, so even if this Xcode template changes in the future, you should still be able to go through this post.
And the RealityKitContent package file, which we will take a look later by opening it with Reality Composer Pro.
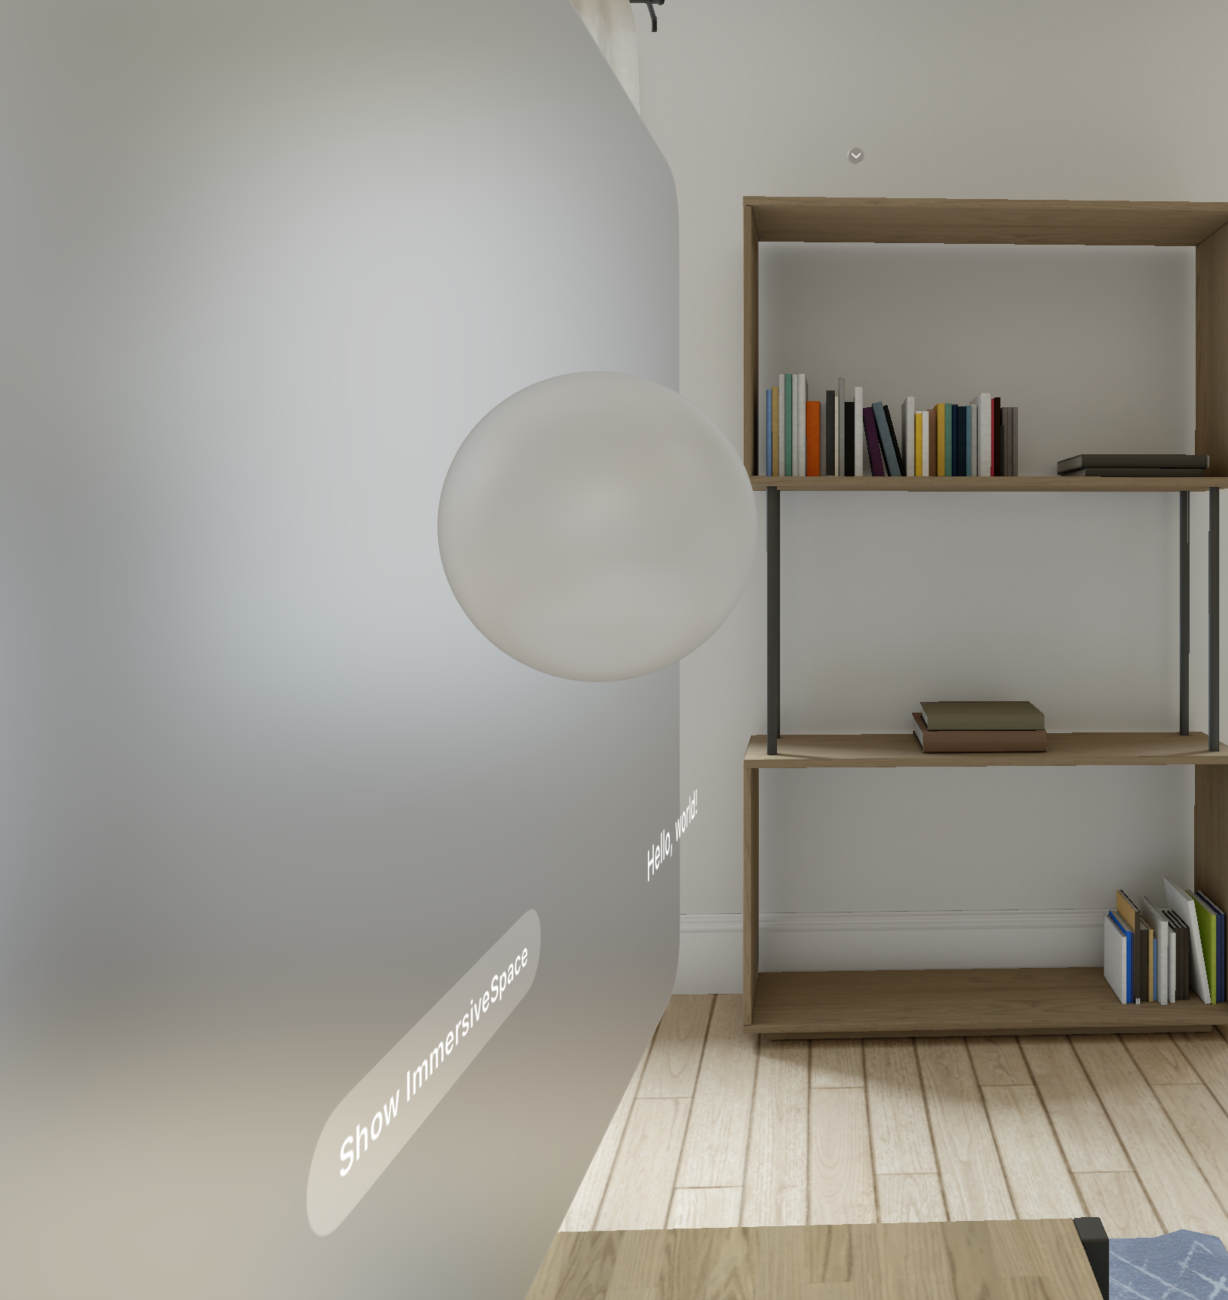
If you hit the run button now. It will build to the simulator. You should see a 2D panel at first, and then when you click on the Show ImmersiveSpace button, it will show two sphere in your room.
What is ContentView()?
The ContentView.swift is the file that describe the initial 2D window you see. It is a Swift file that uses a UI framework called SwiftUI (very creative name).
If you’ve never read SwiftUI code before, this may seem daunting – but it’s actually super easy to read once I explain it. I’ve copied the code below:
import SwiftUI
import RealityKit
import RealityKitContent

struct ContentView: View {


    @State var showImmersiveSpace = false
    @Environment(\.openImmersiveSpace) var openImmersiveSpace
    @Environment(\.dismissImmersiveSpace) var dismissImmersiveSpace

    var body: some View {
        NavigationSplitView {
            List {
                Text("Item")
            }
            .navigationTitle("Sidebar")

        } detail: {
            VStack {
                Model3D(named: "Scene", bundle: realityKitContentBundle)

                    .padding(.bottom, 50)

                Text("Hello, world!")

                Toggle("Show ImmersiveSpace", isOn: $showImmersiveSpace)
                    .toggleStyle(.button)
                    .padding(.top, 50)
            }
            .navigationTitle("Content")
            .padding()
        }
        .onChange(of: showImmersiveSpace) { _, newValue in
            Task {
                if newValue {
                    await openImmersiveSpace(id: "ImmersiveSpace")
                } else {
                    await dismissImmersiveSpace()
                }
            }
        }
    }
}
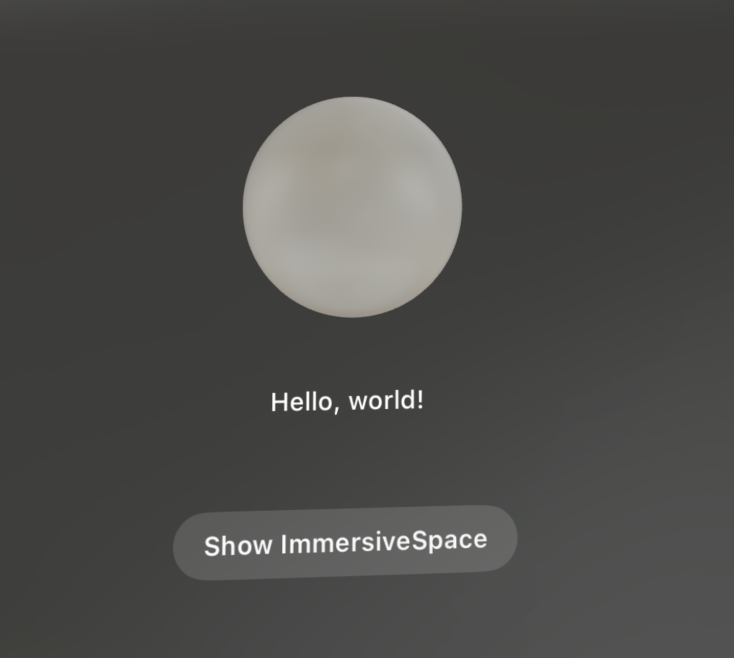
Let’s unpack that it means. The only thing you need to pay attention to are these three lines.
...
Model3D(named: "Scene", bundle: realityKitContentBundle)
	.padding(.bottom, 50)

Text("Hello, world!")

Toggle("Show ImmersiveSpace", isOn: $showImmersiveSpace)
	.toggleStyle(.button)
	.padding(.top, 50)
...
They define this view you see:
What is Model3D()
Model3D(named: "Scene", bundle: realityKitContentBundle)
This is a new SwiftUI feature for VisionOS. It basically allows you to imbed a 3D model inside a 2D SwiftUI view. The line is importing a 3D model called Scene from a bundle with the id realityKitContentBundle.

What’s new in Text()?
Text("Hello, world!")
Well, this is very straightforward. It’s a text!
One new thing in VisionOS is that you can add depth to SwiftUI components like text. This would allow you to create many cool interactions. e.g. when user look at a button, it float up a bit
Here’s how it works: if I just add a offset in the z axis (depth). I’ll have this:
Text("Hello, world!")
	.offset(z: 100)
Transition from Window to Immersive Space
Toggle("Show ImmersiveSpace", isOn: $showImmersiveSpace)
The last line is creating a button that the user can toggle. It will write to the variable showImmersiveSpace as the user toggles it. However, this line only write to the variable, the actual transition magic happens inside .onChange.
...
.onChange(of: showImmersiveSpace) { _, newValue in
	Task {
		if newValue {
			await openImmersiveSpace(id: "ImmersiveSpace")
		} else {
			await dismissImmersiveSpace()
		}
	}
}
The .onChange view modifier is called whenever showImmersiveSpace changes. It will check if it’s true or false, then call the new VisionOS function: openImmersiveSpace and dismissImmersiveSpace, to either open or dismiss the immersive space.
In general, you can use .onChange to monitor changes in any variables that is marked as @Stateinside a SwiftUI view.
Now let’s look at how the immersive space is created
What is ImmersiveView()?
The ImmersiveView is another SwiftUI view similar to ContentView with one major difference: it also uses a game engine called RealityKit to render 3D content.
I’ve copied the code below, let’s walk through them together:
import SwiftUI
import RealityKit
import RealityKitContent

struct ImmersiveView: View {
    var body: some View {

        RealityView { content in
            // Add the initial RealityKit content
            if let scene = try? await Entity(named: "Immersive", in: realityKitContentBundle) {
                content.add(scene)
            }
        }

    }
}
The main new feature for VisionOS here is RealityView. With this view, you can leverage the full power of RealityKit inside a SwiftUI view, including physics system, scene rendering, ECS, animation, etc. If folks are interested, I may write up a tutorial on RealityKit + VisionOS.
Let’s take a look at what’s inside the RealityView:
How to Load a Scene
Entity(named: "Immersive", in: realityKitContentBundle)
In this example, we load in a Entity named Immersive from realityKitContentBundle. An entity is just an object in a game – it can be a model or a collection of models. (It is similar to the GameObject in Unity and an Actor in Unreal.) Note that this has the same result as the Model3D call that we used in ContentView, the main different is Model3D works in views that don’t uses RealityKit, hence you can’t access the full power of RealityKit using Model3D views.
if let scene = try? await Entity(named: "Immersive", in: realityKitContentBundle) {.
Since we don’t know if that entity is actually inside the realityKitContentBundle or not, we use a if let statement. This basically says, if the model is loaded correctly, assign it to the variable called scene, if not, run the content in else. We also use try? await here because loading an entity is asynchronous.
content.add(scene)
In the positive case of the if let statement, we will add the new scene variable we created , which hold the entity we loaded, to the content of our app. content is a variable provided to us by RealityView. Only entities added to content will be rendered.
How is the app launched?
When you launch an VisionOS app, YourProjectNameApp.swift is the file that defines the initial view of the app. For example, if you want to launch it with a different view you create, you can just replace the ContentView() with WhateverViewYouCreated()
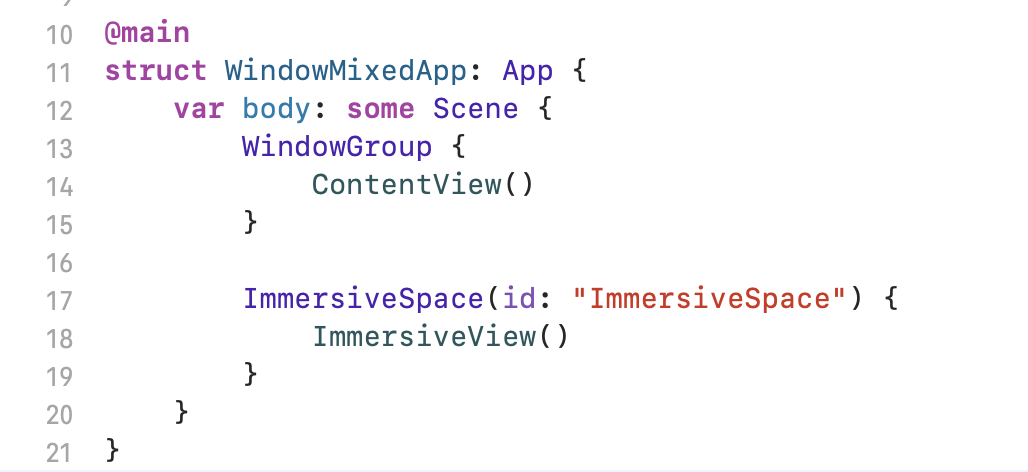
Body
In this example, there are actually two views defined inside the body of the App: a ContentView() and a ImmersiveView().
This is a bit unusual from normal IOS development, where we usually include one view at a time. When you have multiple views inside a body, only the first one will be shown to the user. The reason why we added two views here is because we want to transition from the ContentView() to ImmersiveView() to later on, so it’s easier to just declare both here.
Window vs Volume Views
Now let’s look at what WindowGroup and ImmersiveSpace mean, they are wrapped outside the two views we created.
In VisionOS, there are three types of views.
- Windows: a 2D panel that can imbed display 3D models – if you have an IOS app, you can generally launch it directly in VisionOS as a window app
- Volumes: a 3D volume where your app can run – if your scene is bigger than the volume, only the part inside of the Volume will be shown
- Spaces: you are not bounded by a volume – you can also control the entire environment, even make a full VR game.
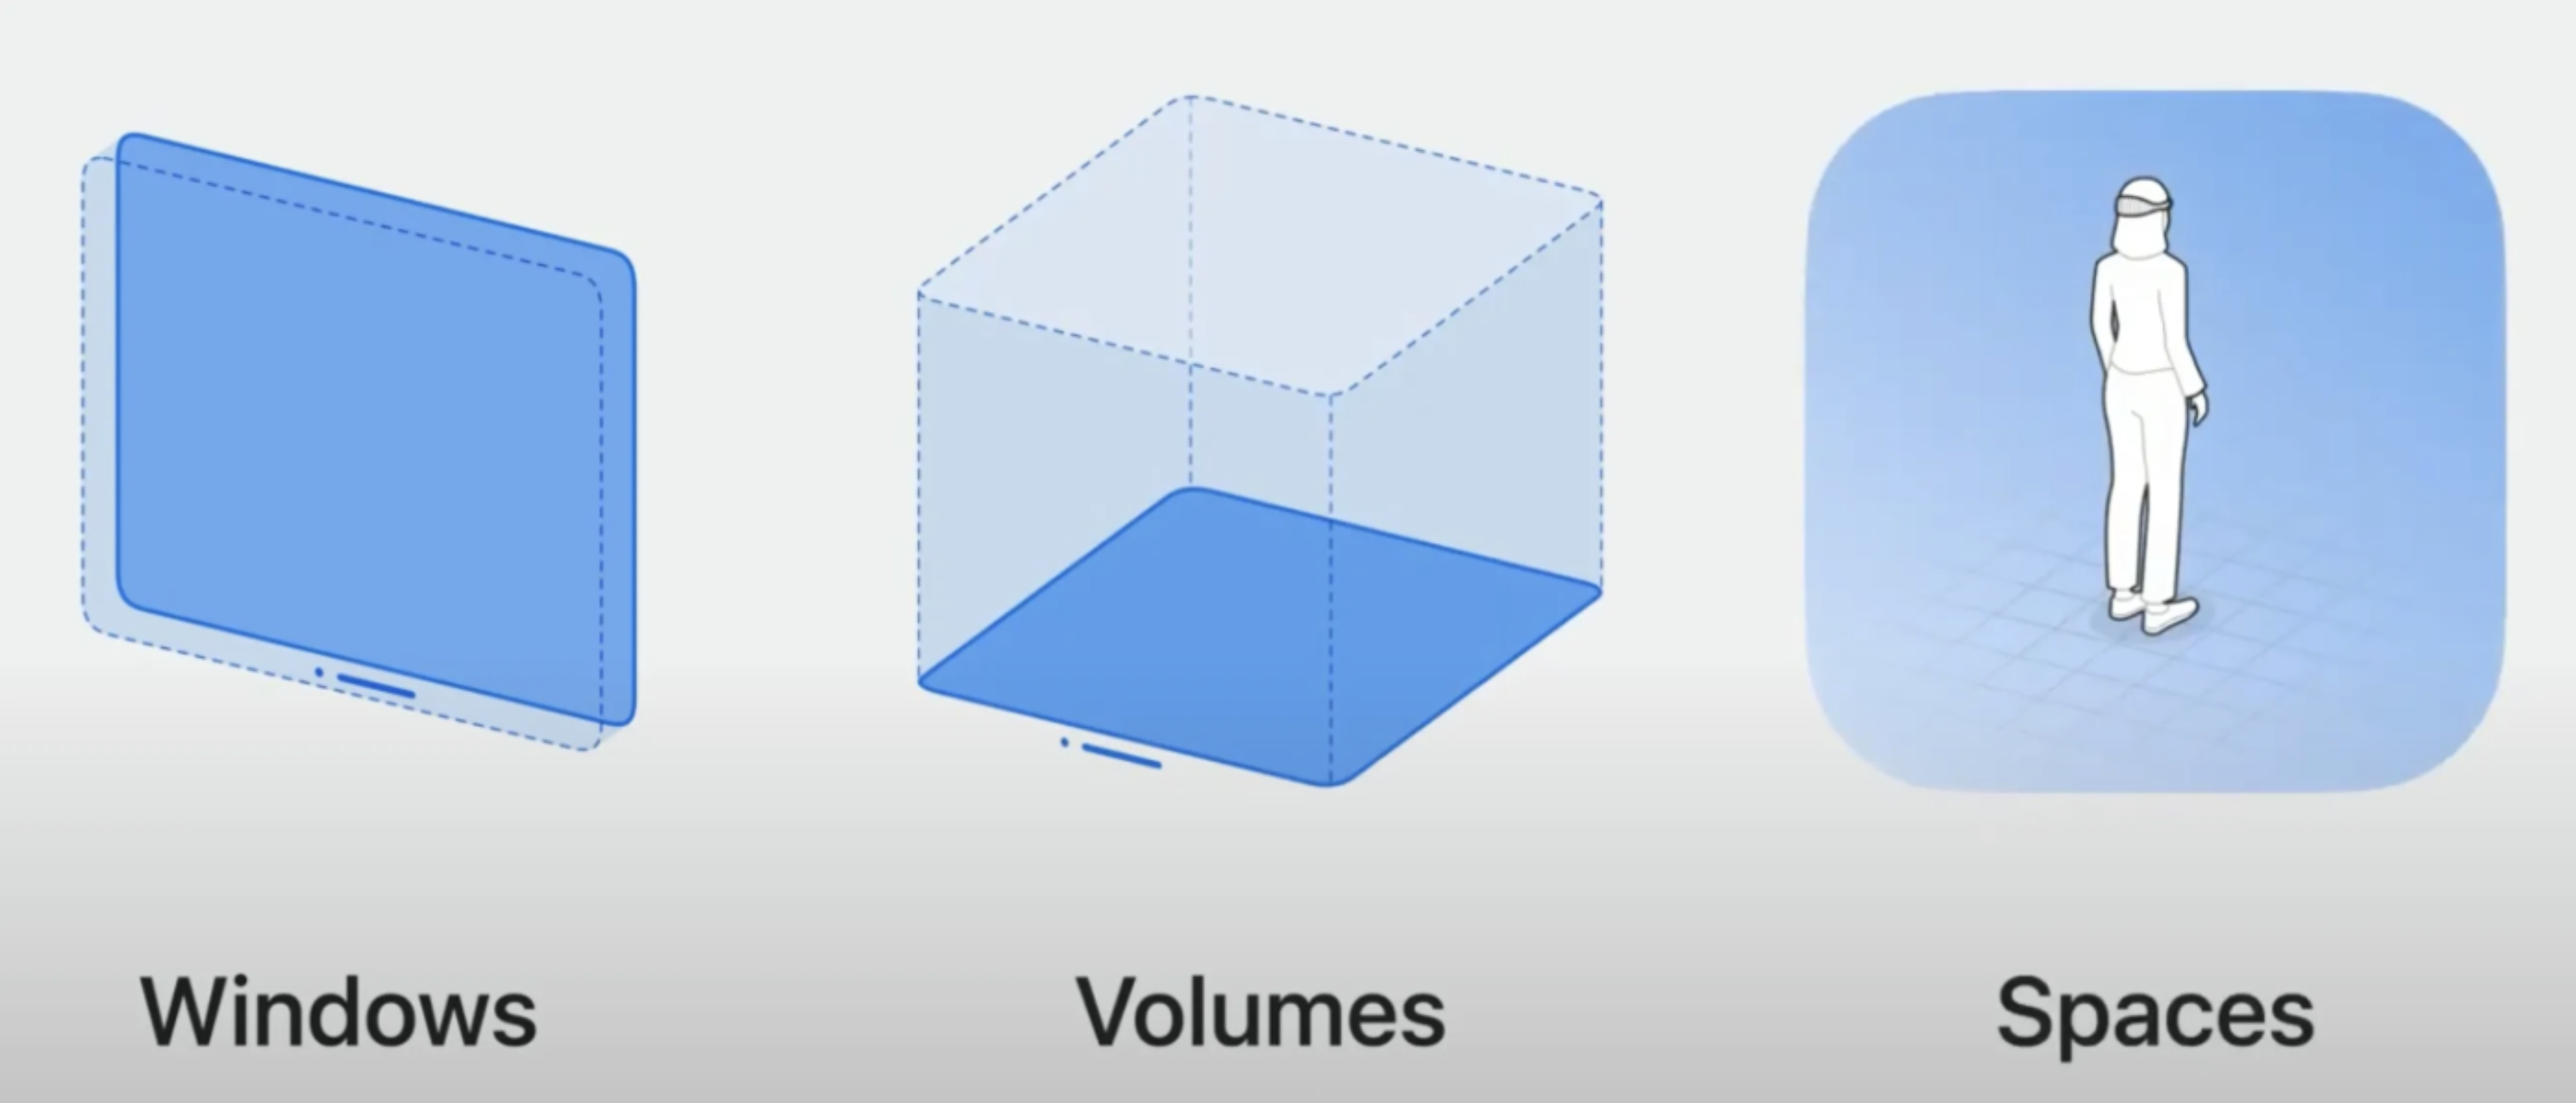
Now that you know the three types, the code above should be pretty easy to understand: the ContentView(), which is only a 2D panel, is wrapping by WindowGroup to indicate this is a 2D thingy. As for the ImmersiveView(), which represent the two sphere that shows up, is a ImmersiveSpace since we need a unbounded space to show the two spheres (I really don’t understand why Apple pick two sphere as their example).
Hooray! Now you’ve understand all the code!!! Let’s play with the 3D stuff!!!
Reality Composer Pro
Up until this point, all we are looking at are the SwiftUI views. Many views loads 3D scenes from a bundle called realityKitContentBundle. Let’s look at what’s inside that bundle!
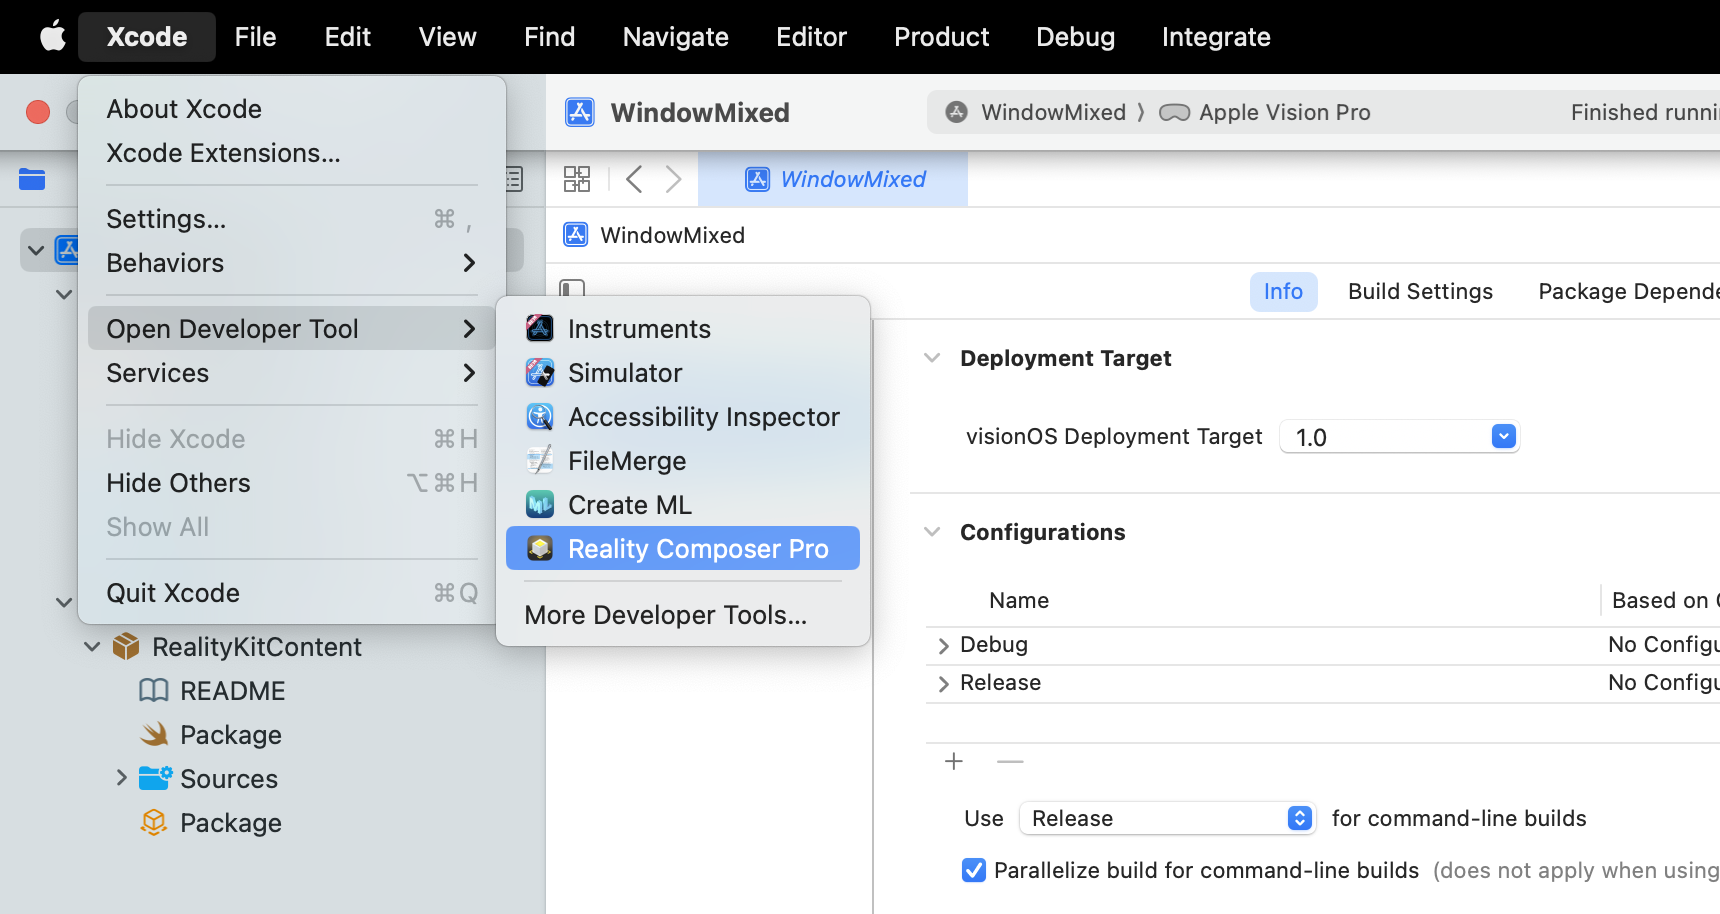
Open up Reality Composer Pro by going Xcode -> Open Developer Tool -> Reality Composer Pro
Select Open existing, navigation to your Xcode project, and go to Packages -> RealityKitContent and select Package.realitycomposerpro to open.
You should see this when it finished loading:
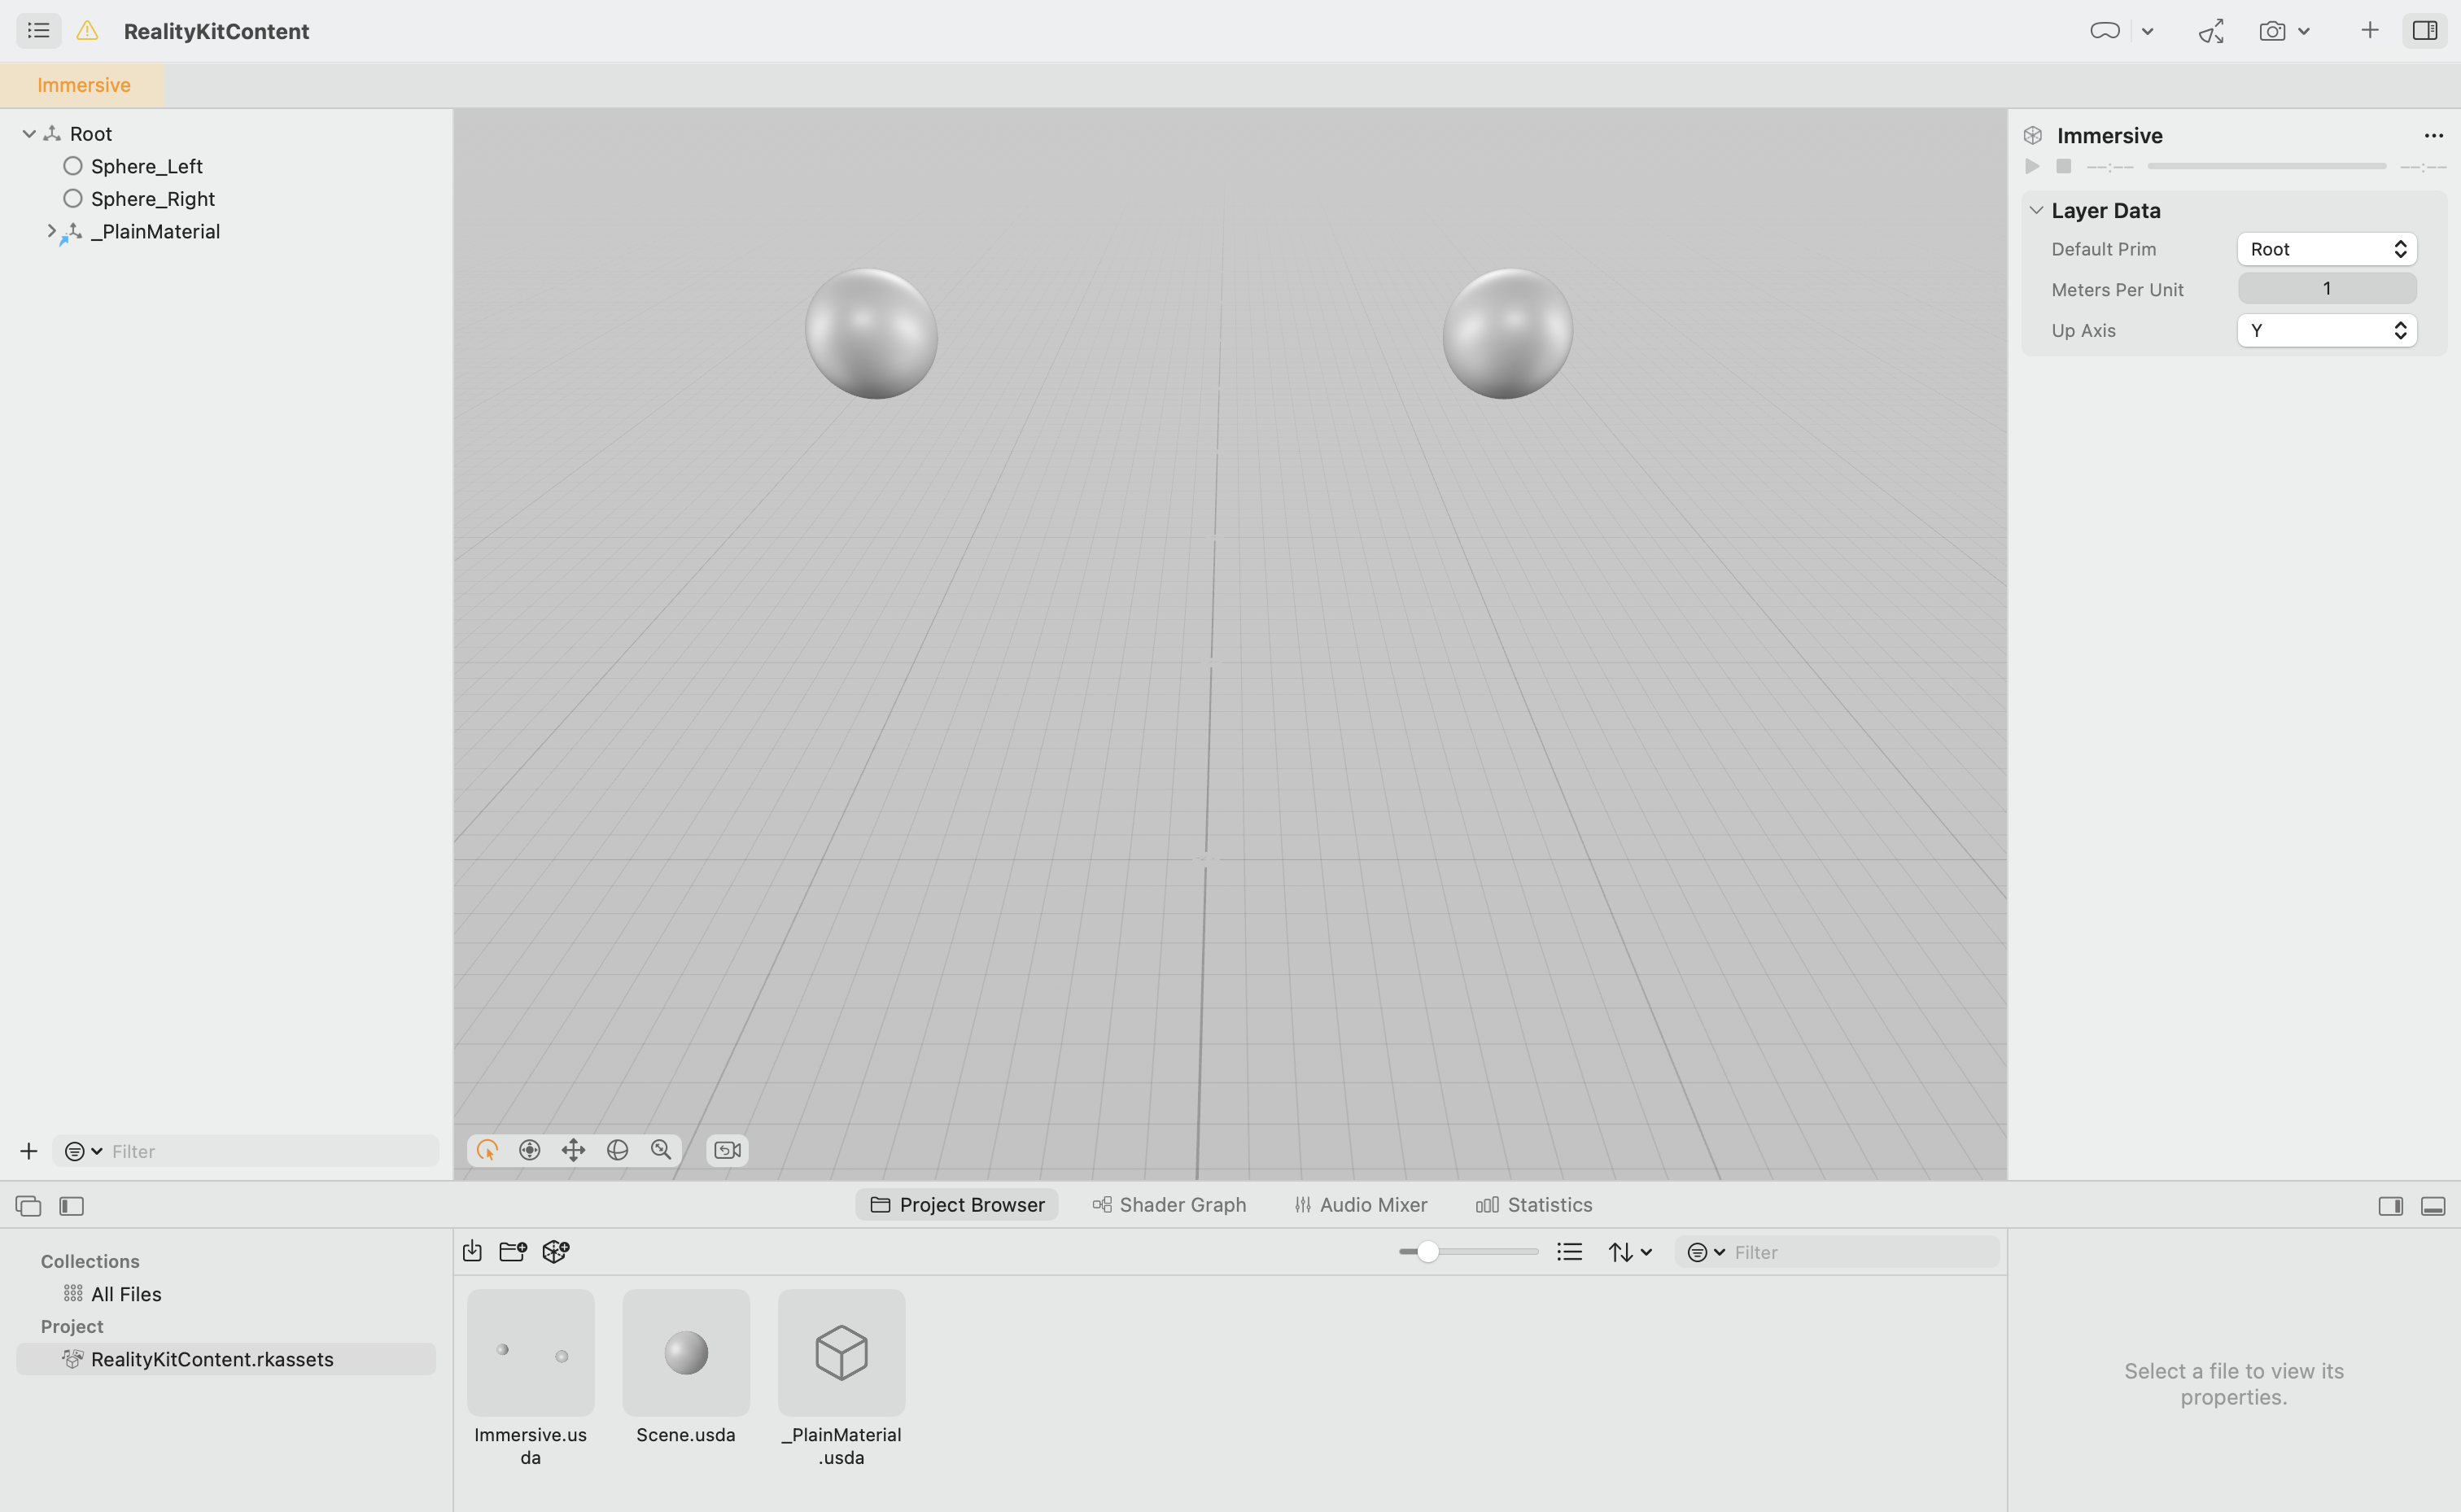
If you’ve used Unity or Blender, this will look very familiar. You can use WSAD to move around, Q and E to move up and down.
If you look at the Project Browser below, you will see two familiar .usda files: Immersive.usda and Scene.usda. These are the names we used when loading the model in ContentView() and scene in ImmersiveView().
Entity(named: "Immersive", **in**: realityKitContentBundle)Model3D(named: "Scene", bundle: realityKitContentBundle)
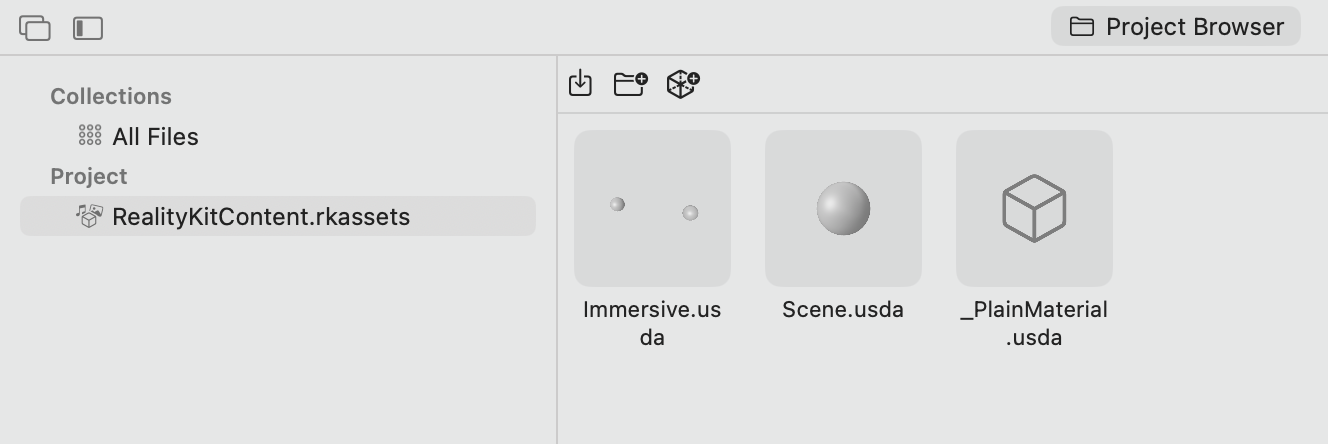
Now let’s play around with it, double click on Scene.usda, click on the + button on the top right, it has a selection of 3D models you can use. Drag and drop it to your scene.
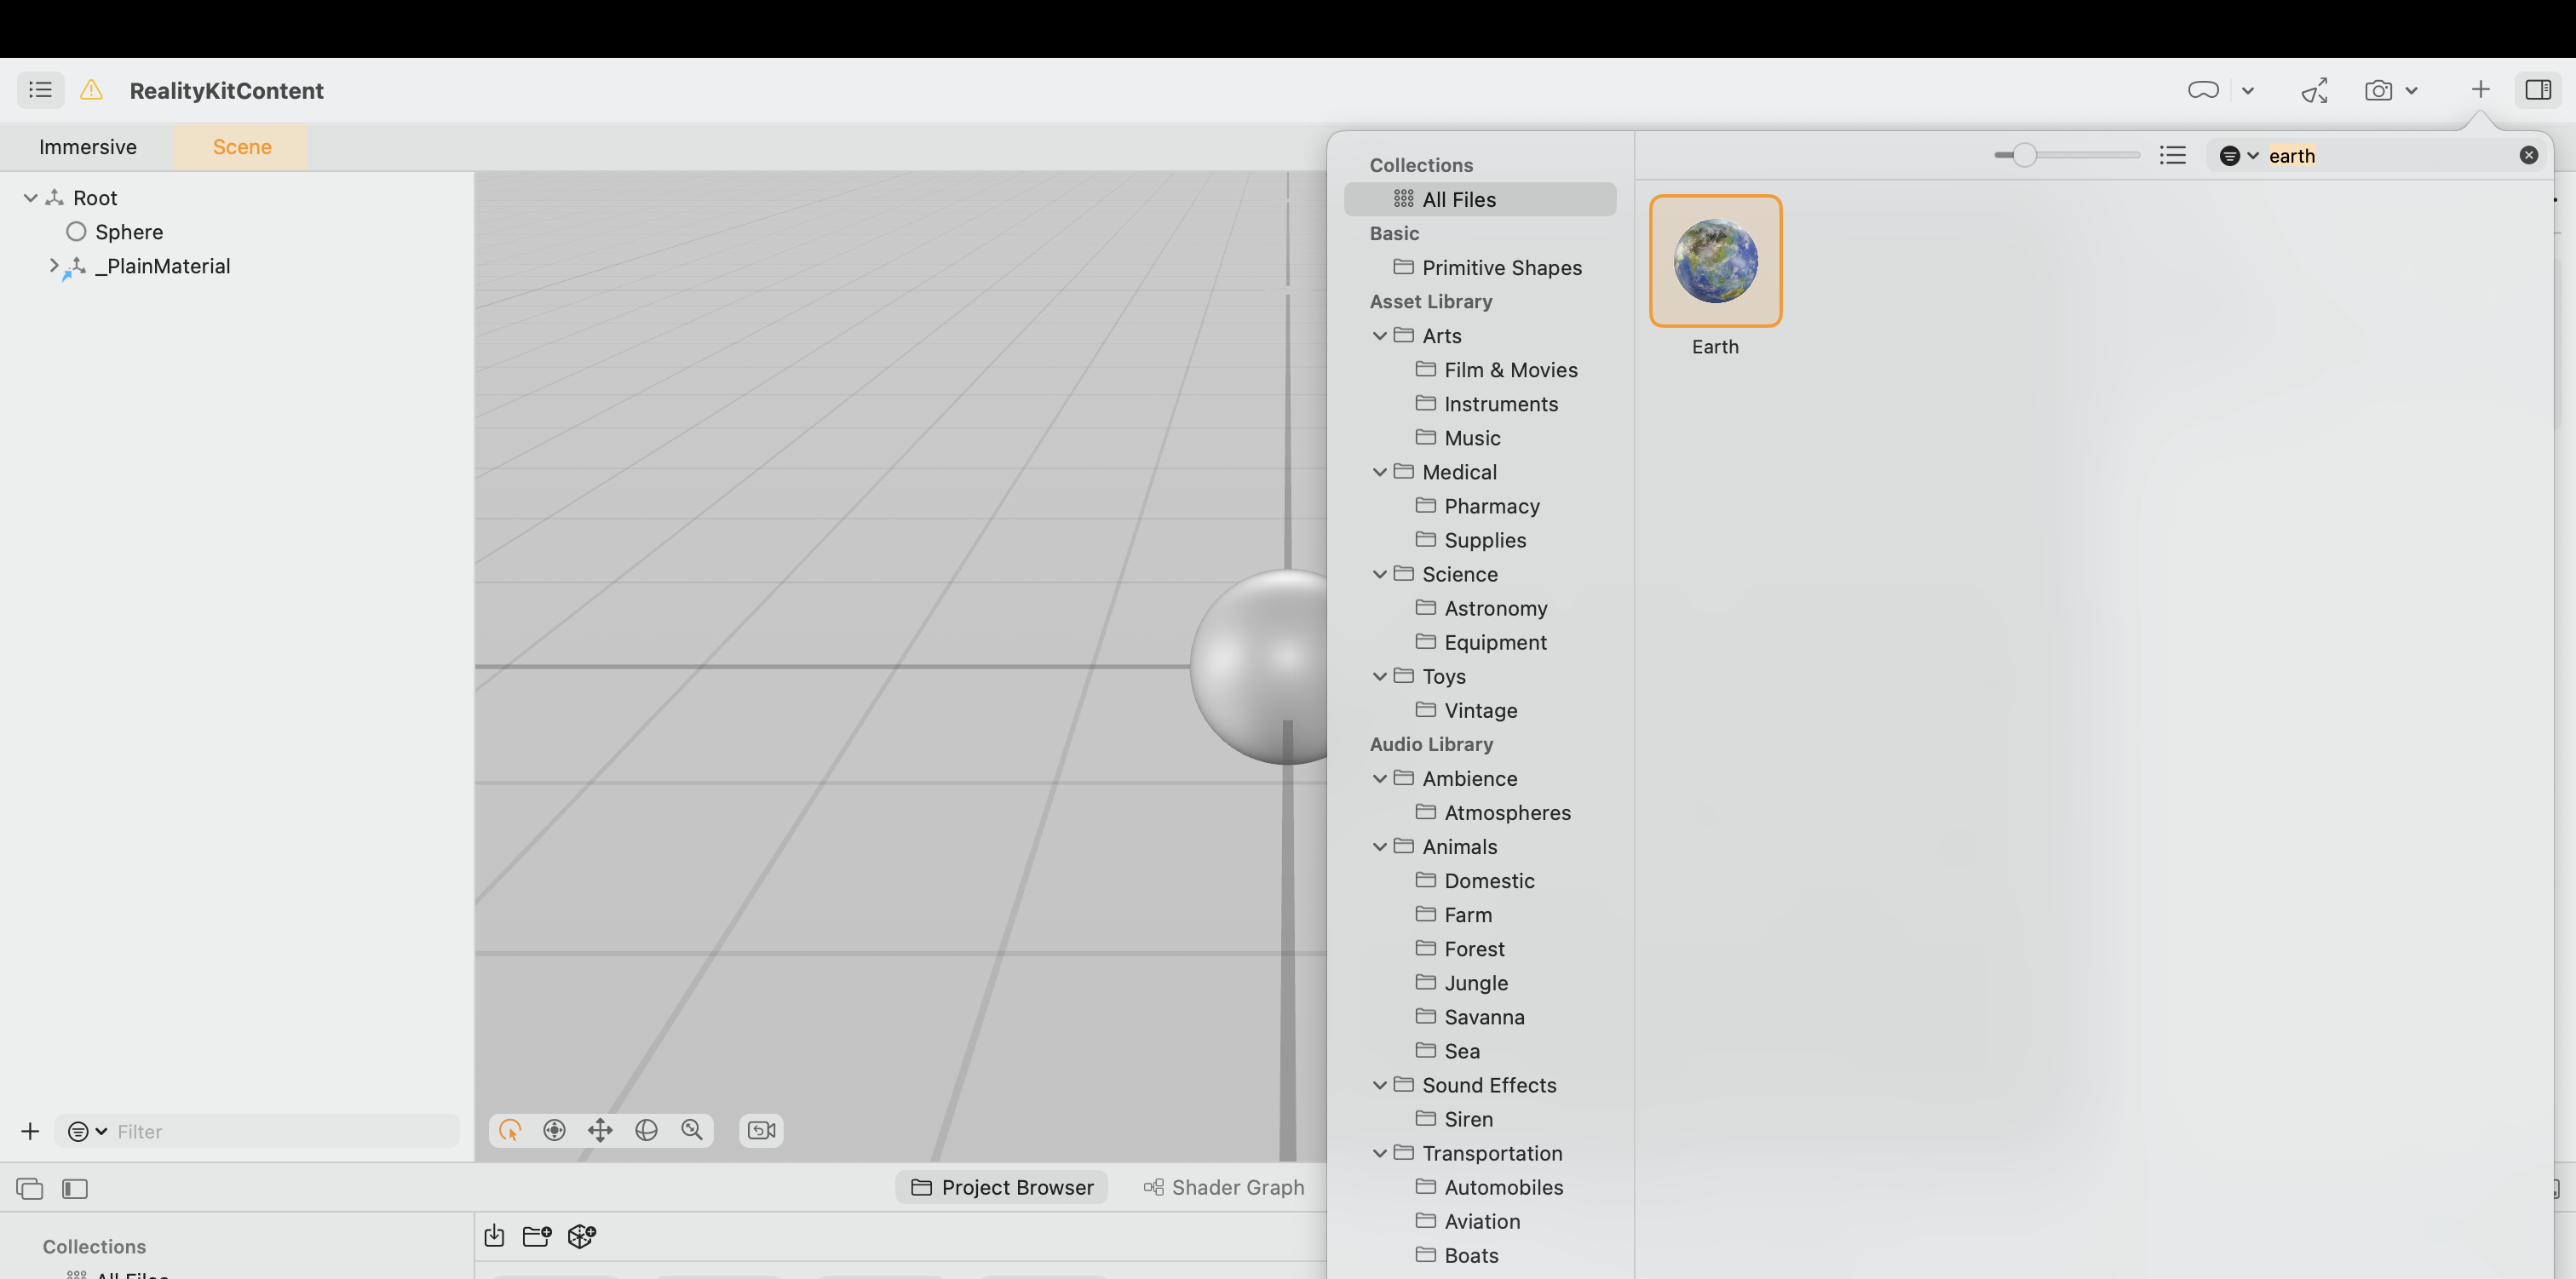
You can delete the other once so Earth is the only model in the Root.
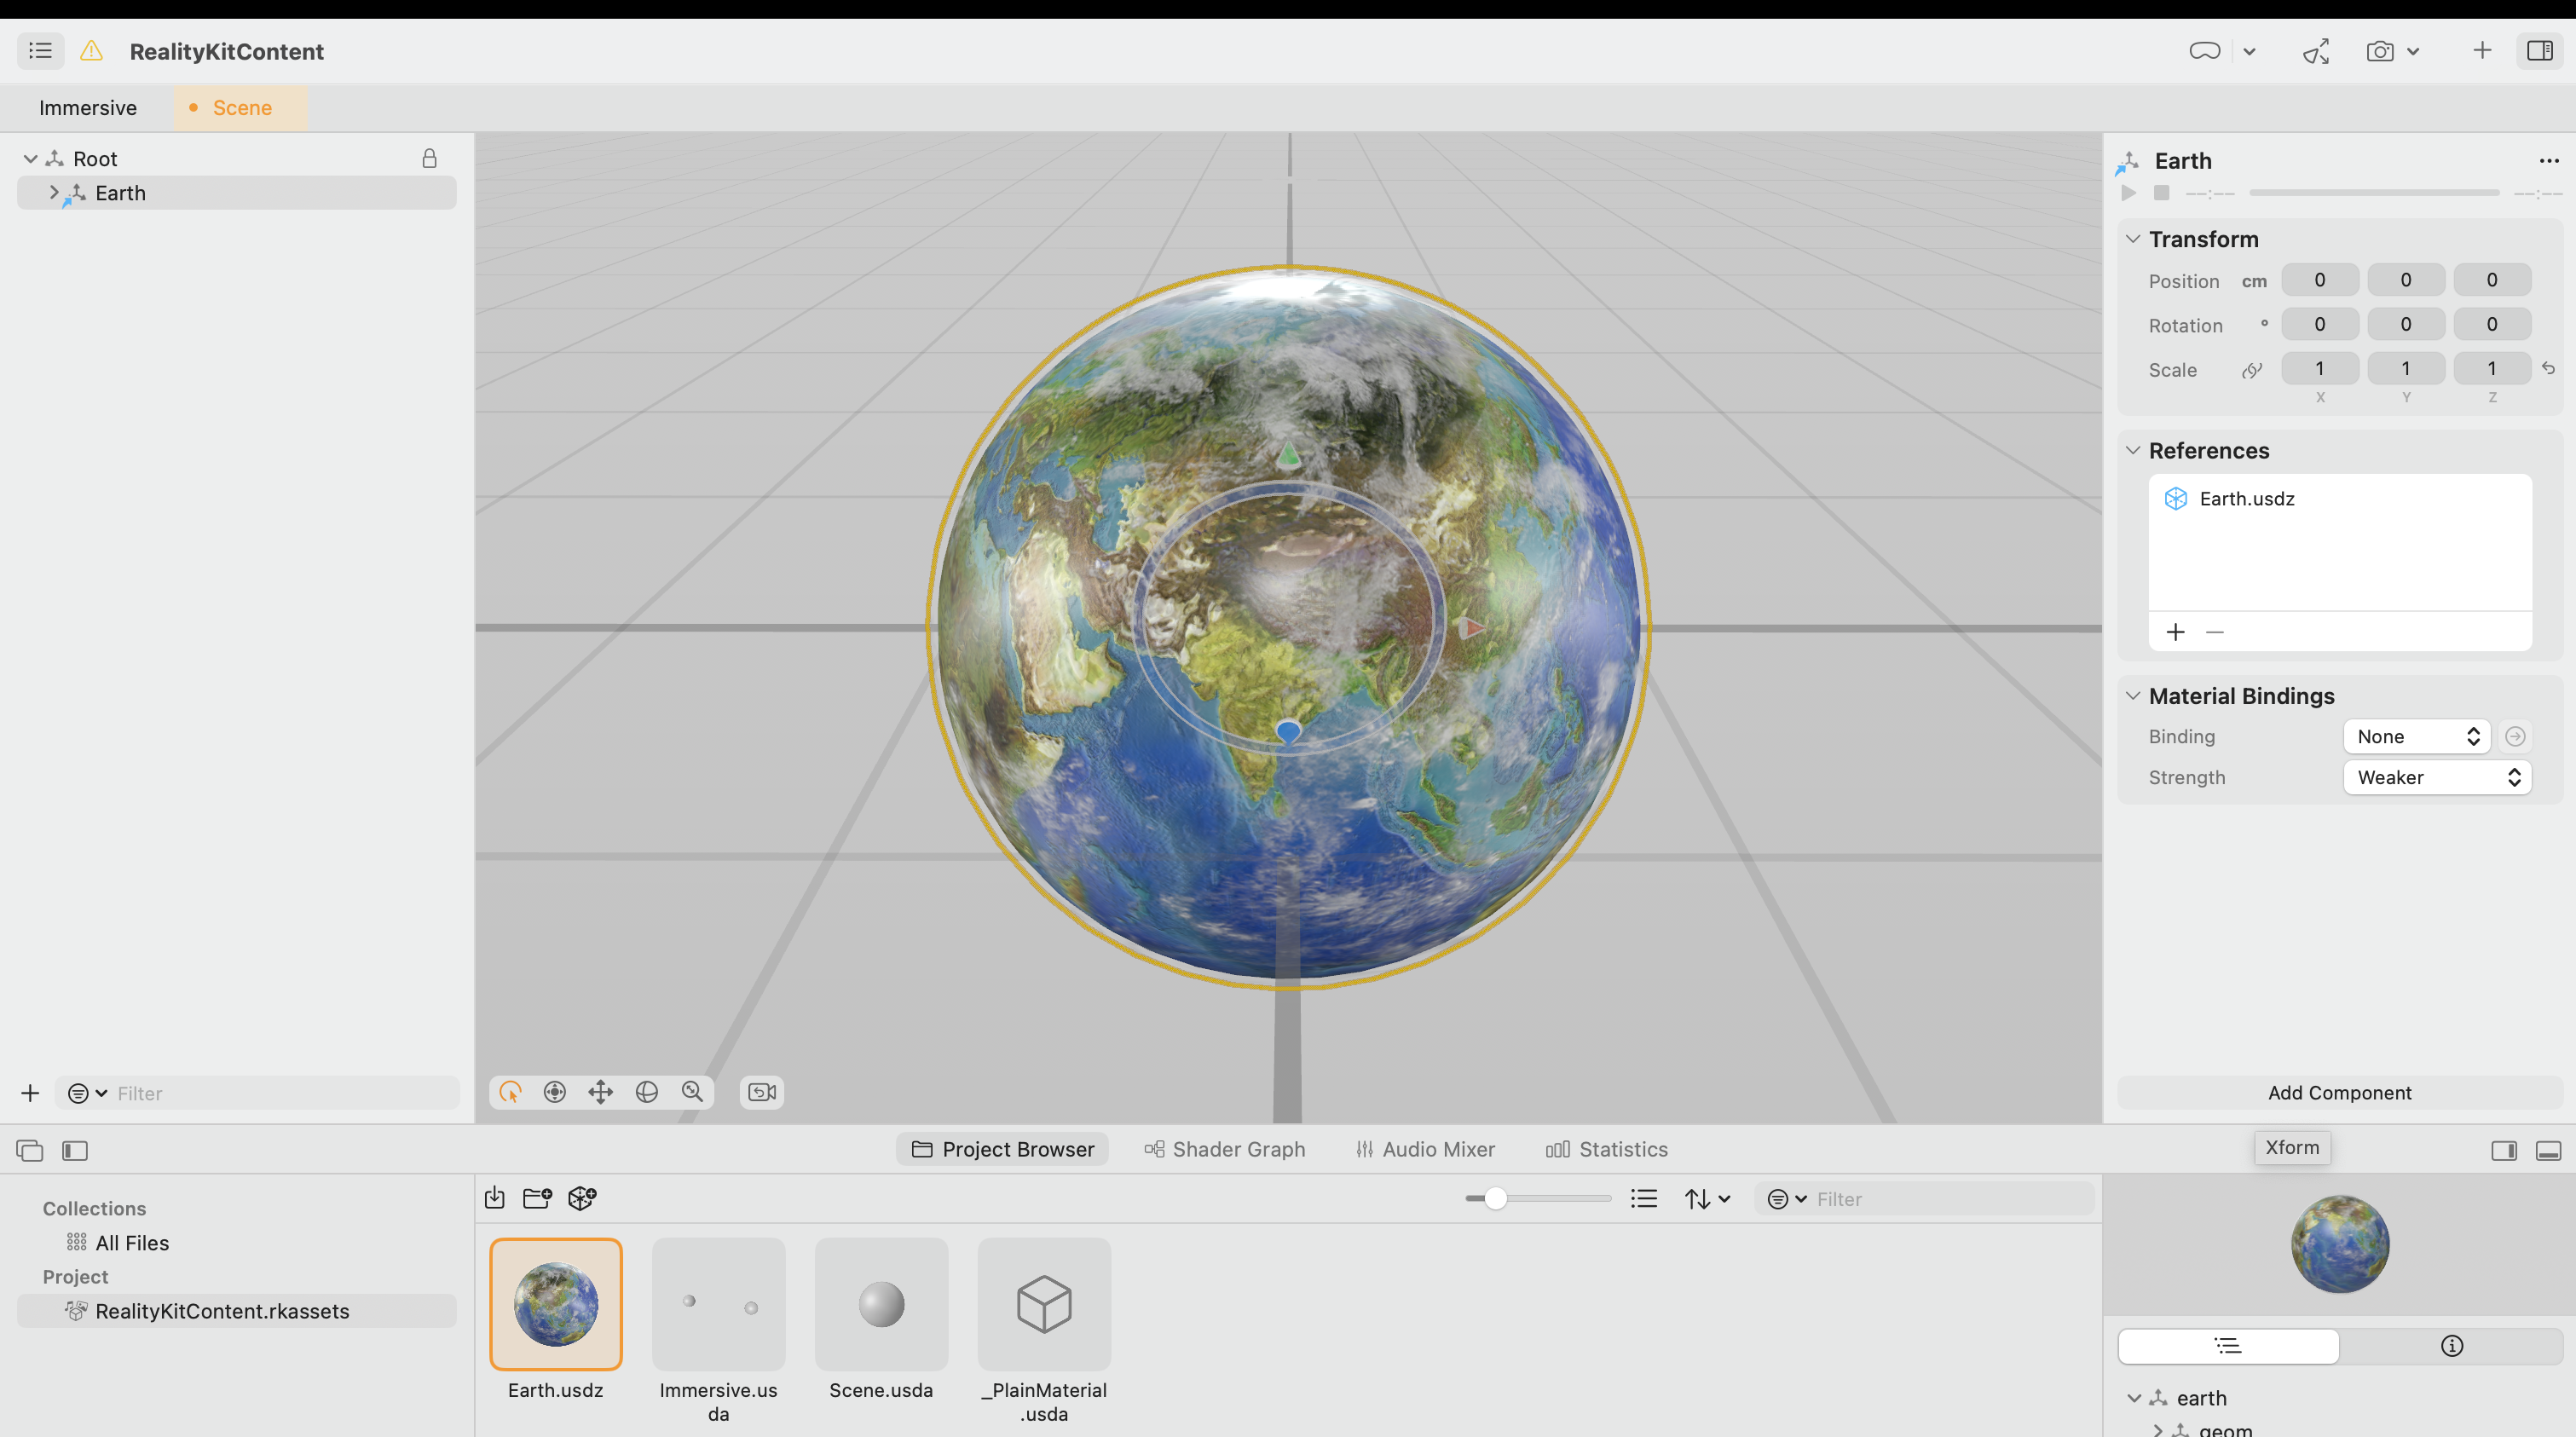
After you save, you can go back to Xcode and rebuild the app. You will see an earth now!
You can also open up Immersive.usda and play around with it!

Closing
Thank you for reading up to this point! Crafting a detailed tutorial isn’t a simple task.
Currently, there are only a few resources available for VisionOS, given its status as a budding platform. If you’re eager to learn more, I recommend checking out the WWDC talks and watching some iOS tutorials that cover SwiftUI and ARKit.
Personally, I’m incredibly excited about the VisionOS platform. As an experienced Unity developer with a track record of delivering over 5 VR games, as well as an experienced iOS developer with 4+ shipped iOS apps, I’m thrilled to be able to merge both of my passions on this platform.
If you’re interested in more tutorials from me, please consider subscribing and liking this post. I plan to create tutorials in the following areas:
- SwiftUI + VisionOS
- RealityKit + VisionOS (covering how to create your first game)
- ARKit + VisionOS (exploring the creation of a mixed reality app)
However, considering the time it took to write this tutorial…, I’m still undecided.